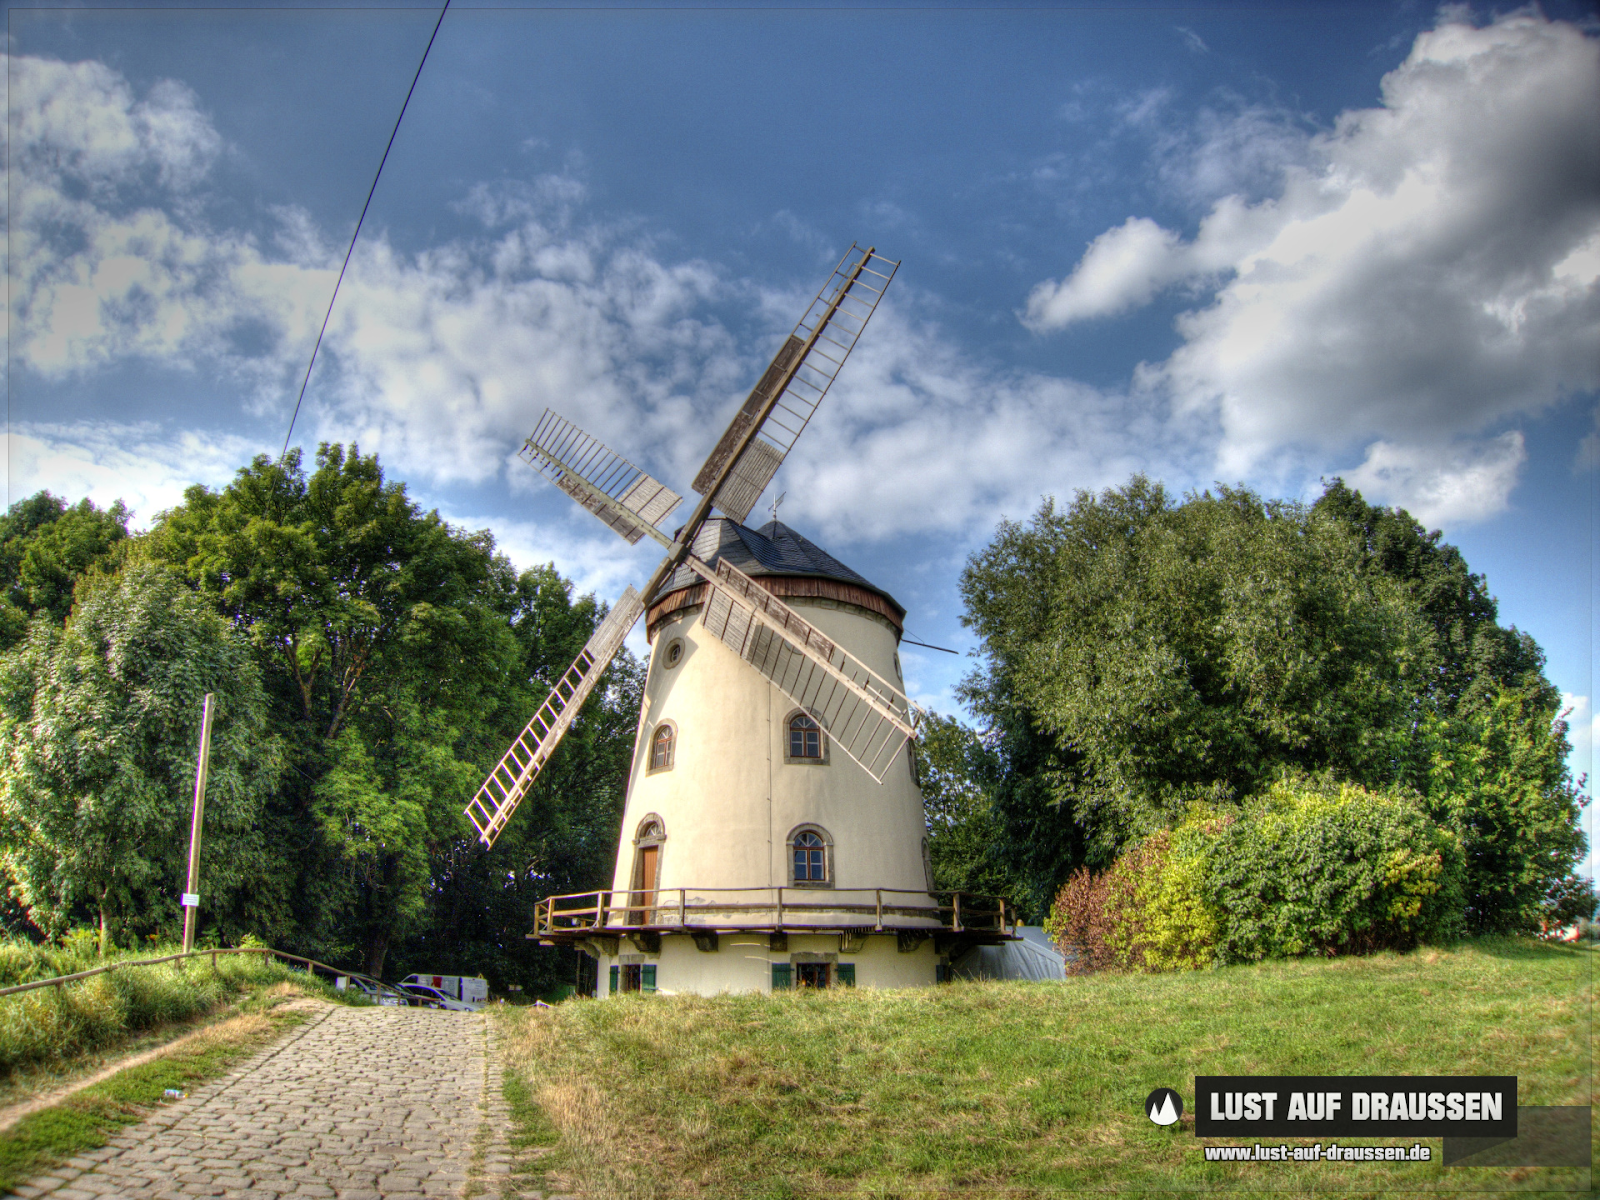
This is the second (and last!) big project I finished during my firsts year at uni (Check previous post for introduction). It's a model of the Gohliser Windmill in Germany.
Check it out:


Now onto the build write up!
A picture of the Gohliser Windmill.
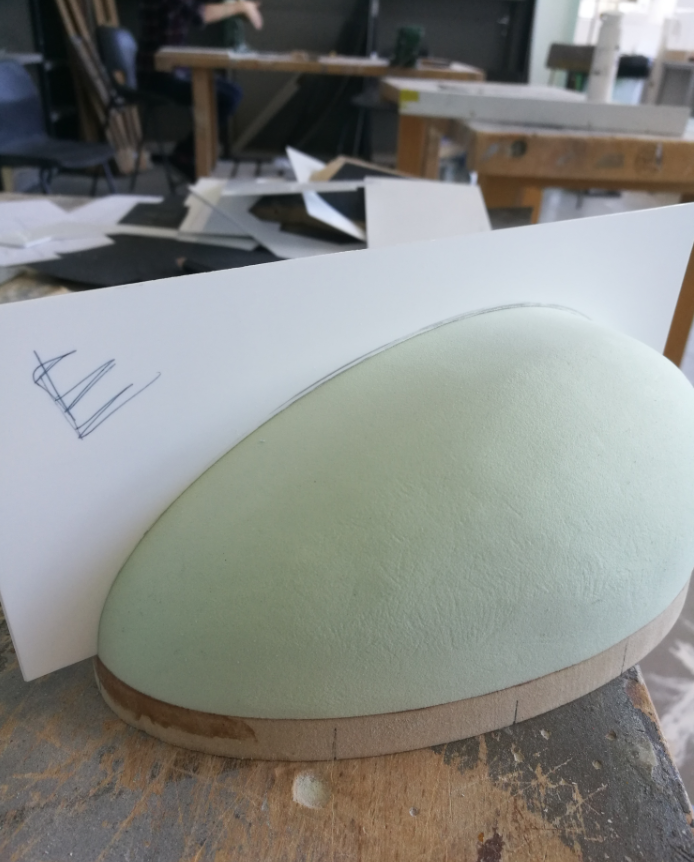
I began this project build by first constructing a sketch model.
I used mountboard to create the base and sails and card to create the head and body.
I used mountboard to create the base and sails and card to create the head and body.
I used folding techniques to create the housing for the sails which sits upon the roof.

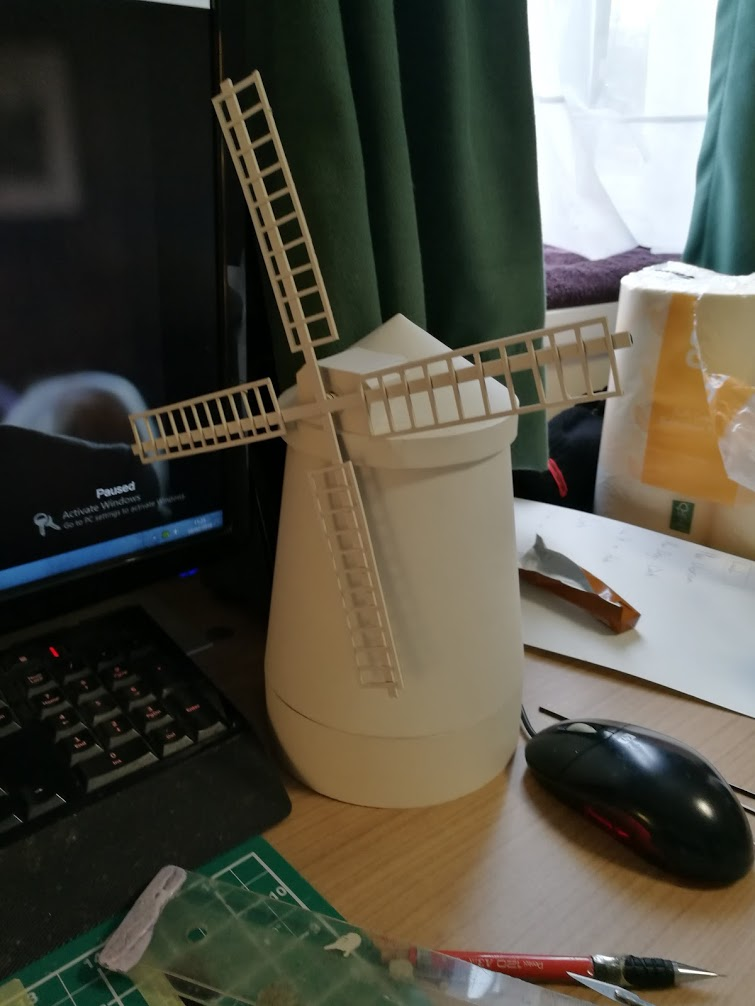
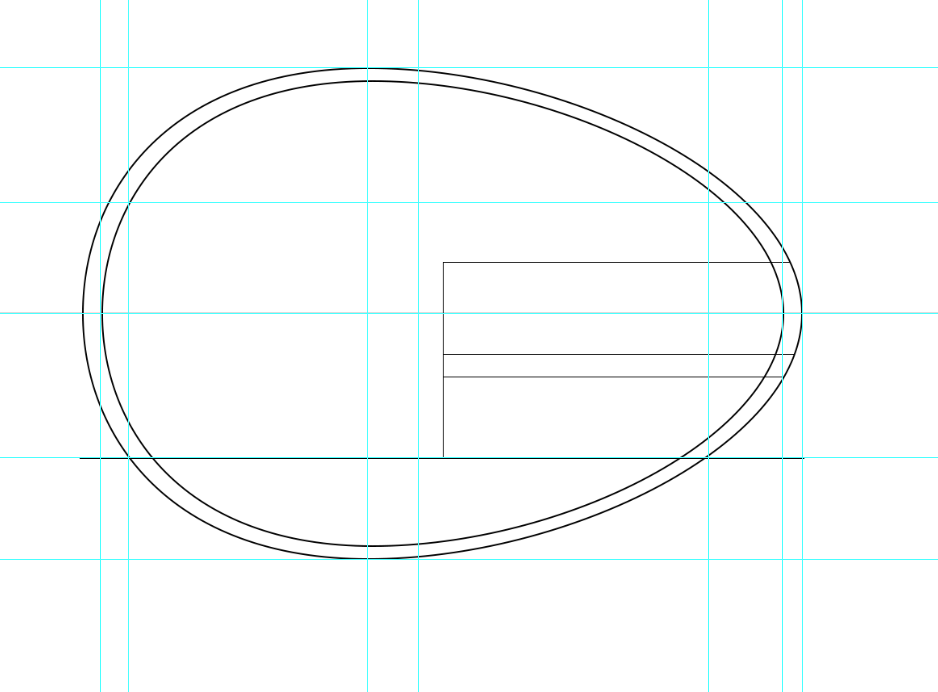
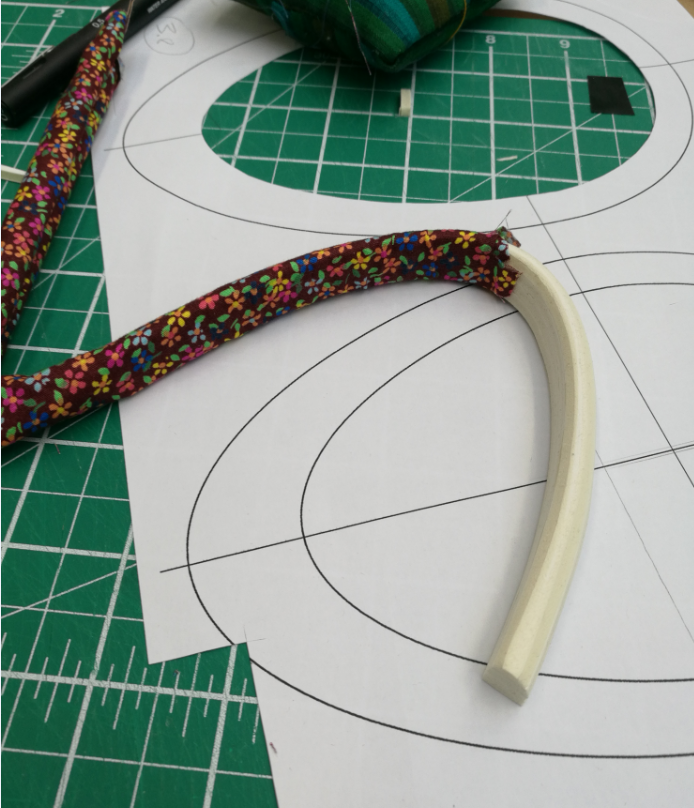
I drew out the reefing deck on card and stuck it to the base using PVA and then made the railings from mountboard.
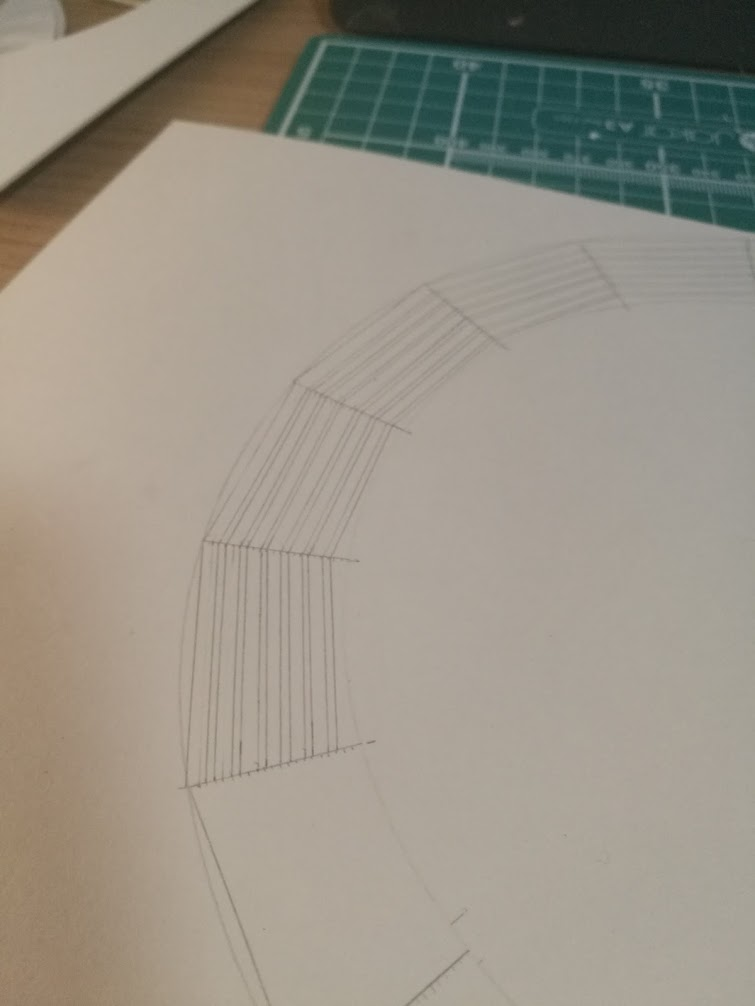
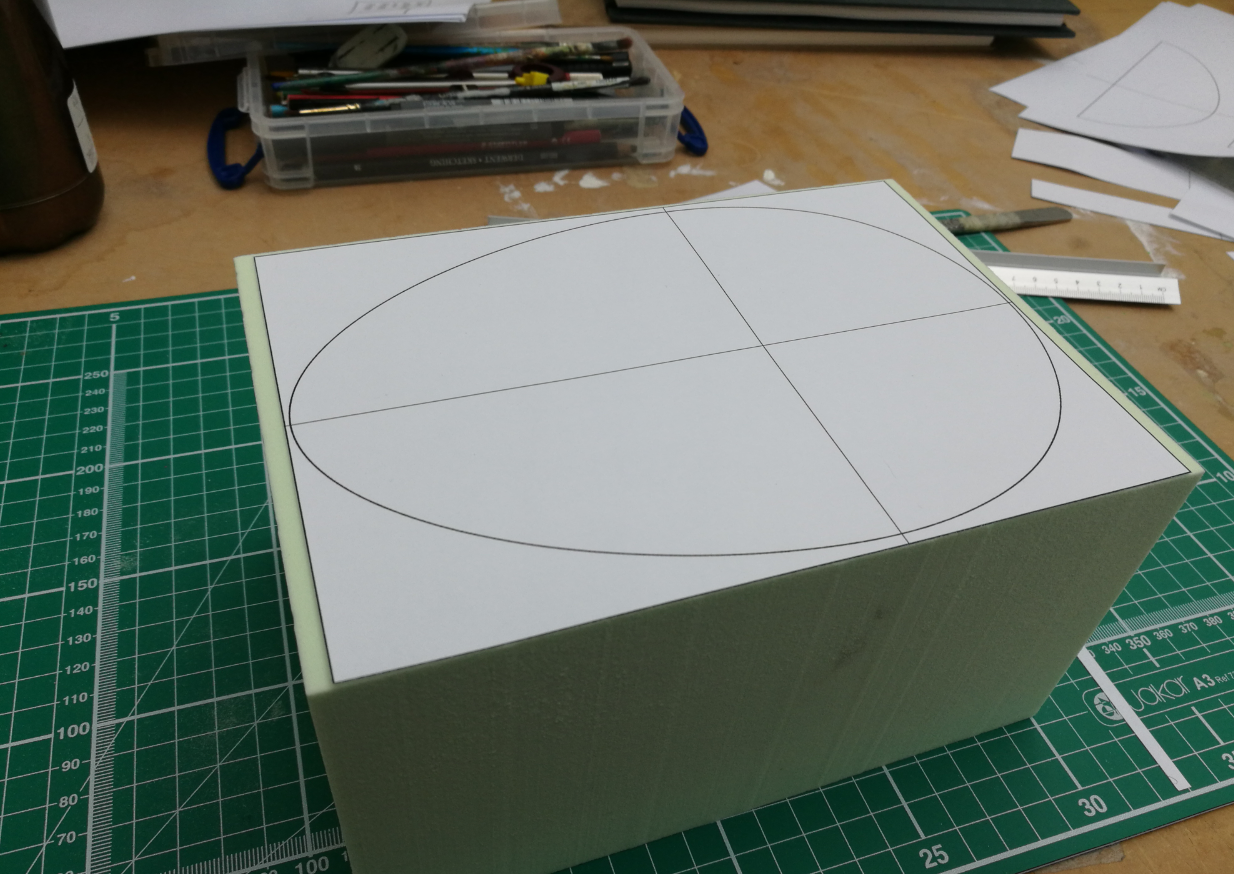
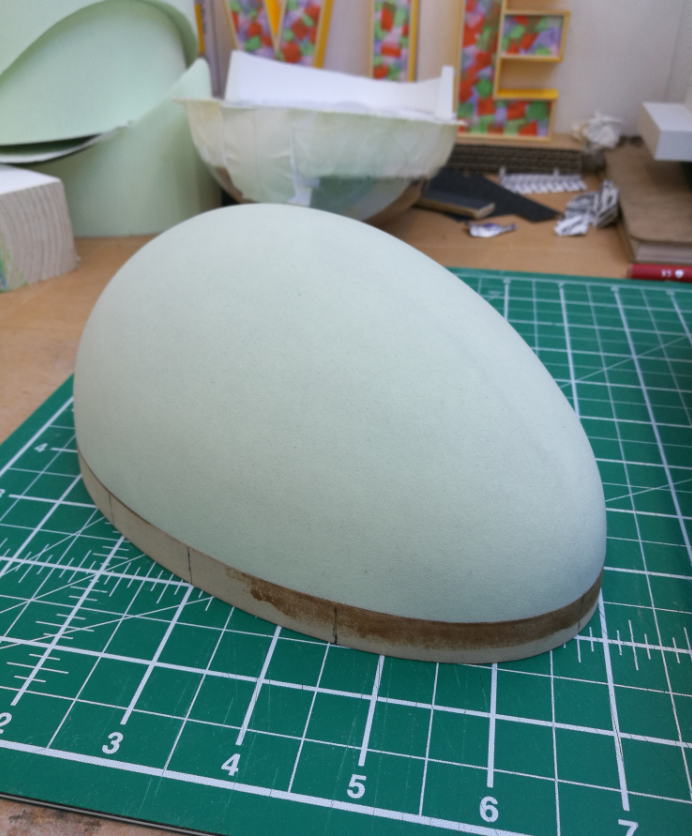
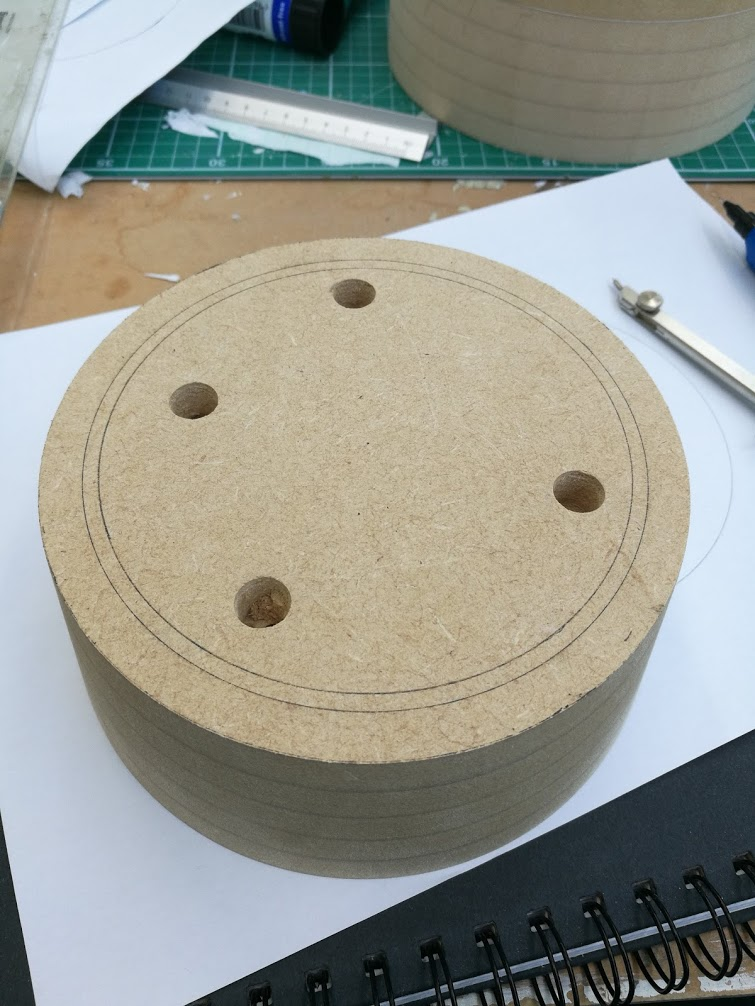
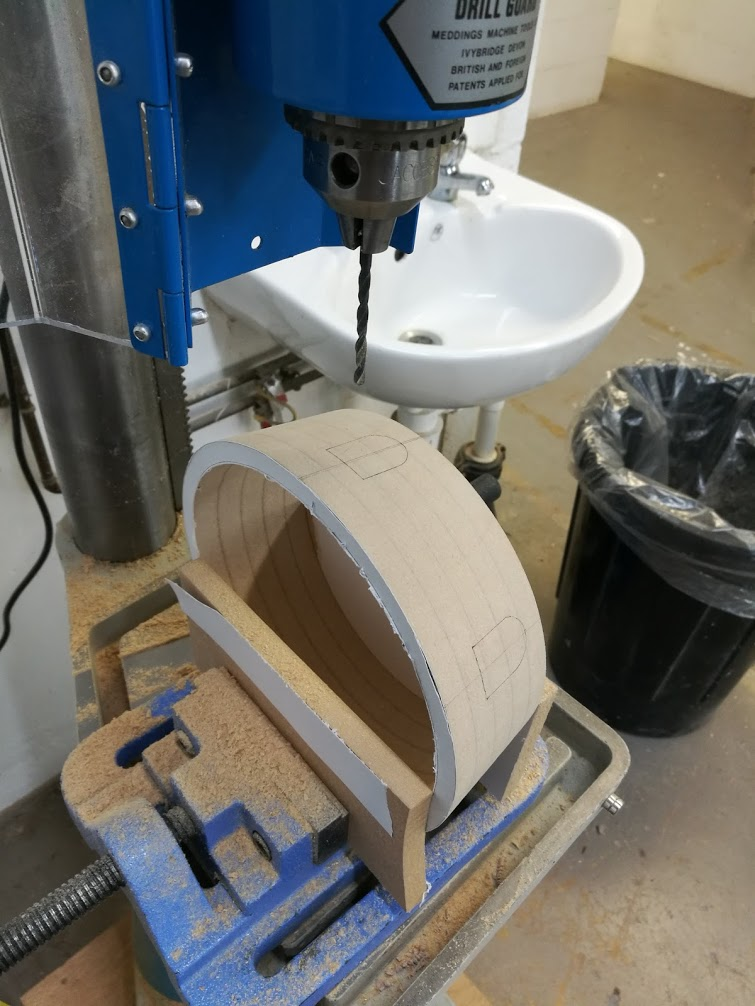
I decided I would make the body of the mill out of 12mm mdf rings.
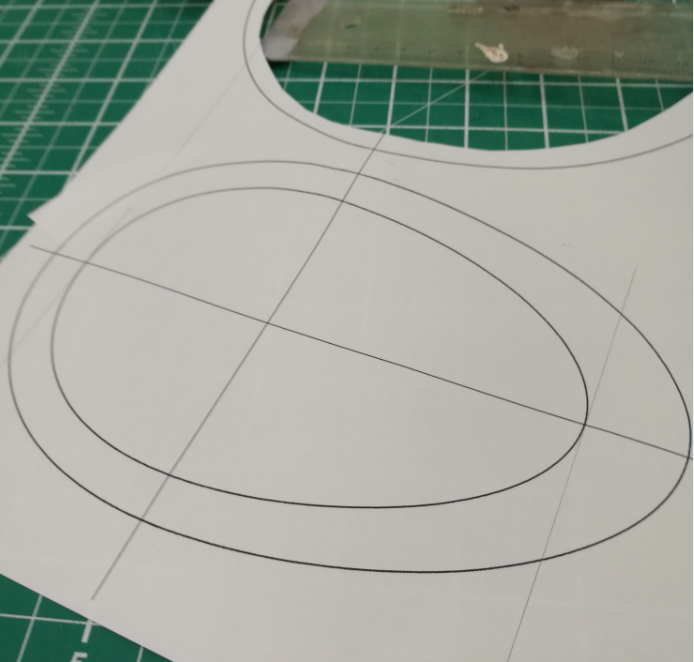
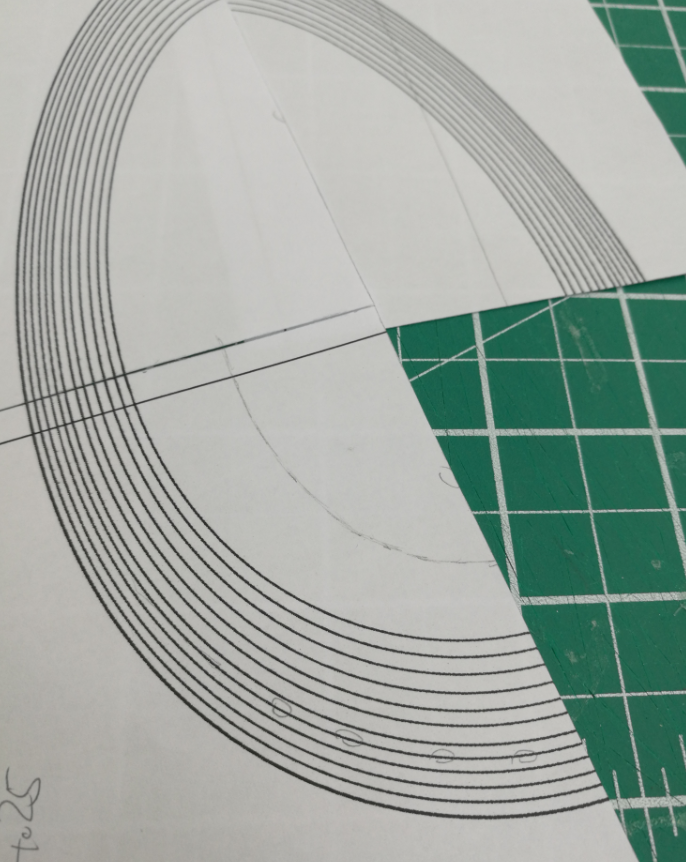
I drew out a scale drawing of the mill then made a mark every 12mm. The mill tapers slightly
towards the top so every ring would be slightly smaller than the previous one. I then created
a template for every ring in photoshop and glued it onto the mdf.
I drew out a scale drawing of the mill then made a mark every 12mm. The mill tapers slightly
towards the top so every ring would be slightly smaller than the previous one. I then created
a template for every ring in photoshop and glued it onto the mdf.

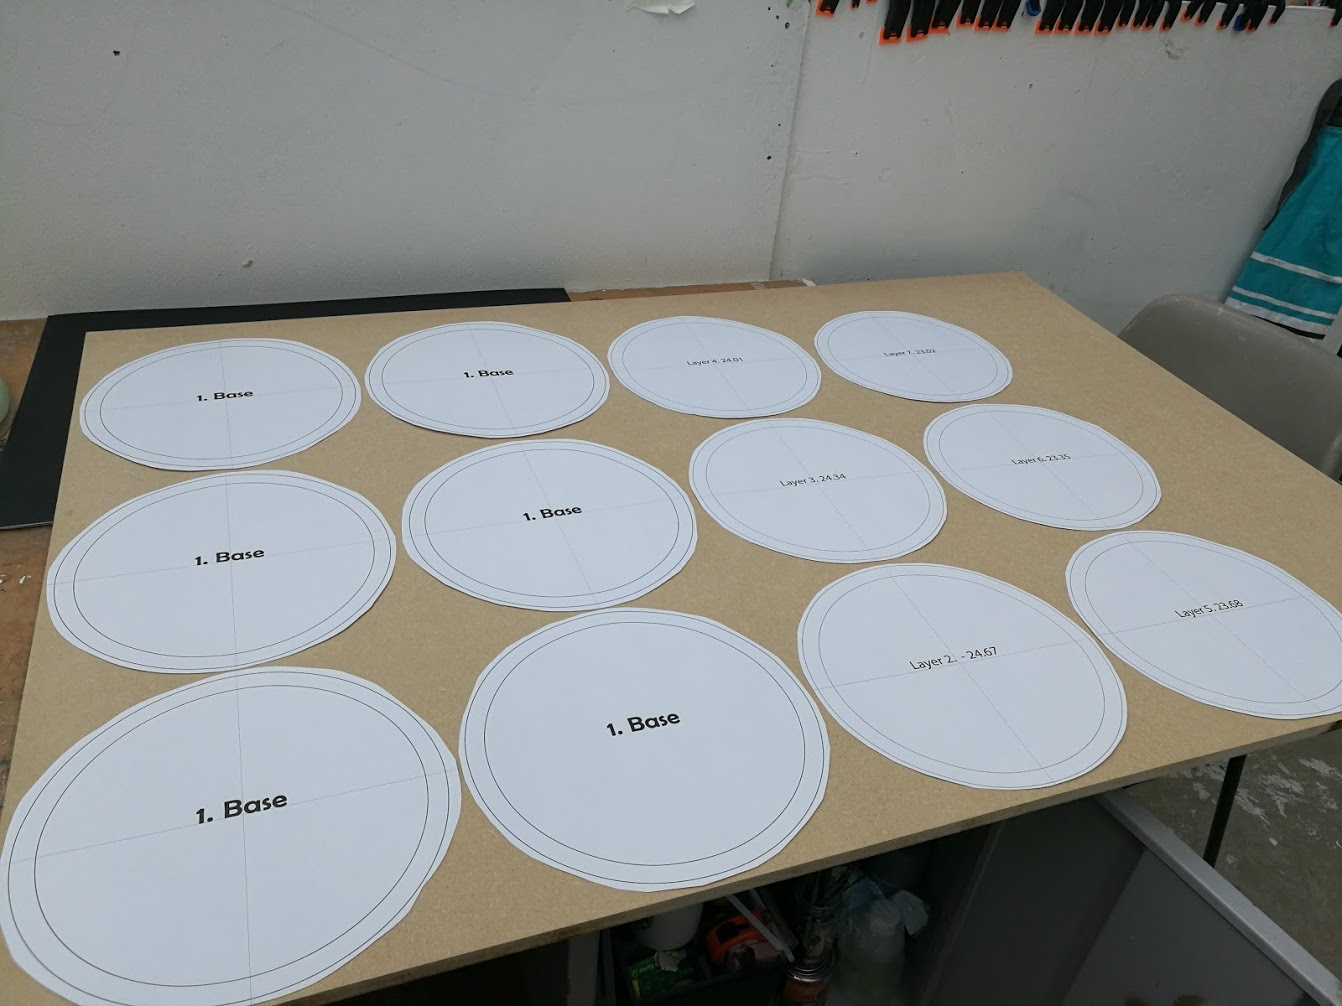
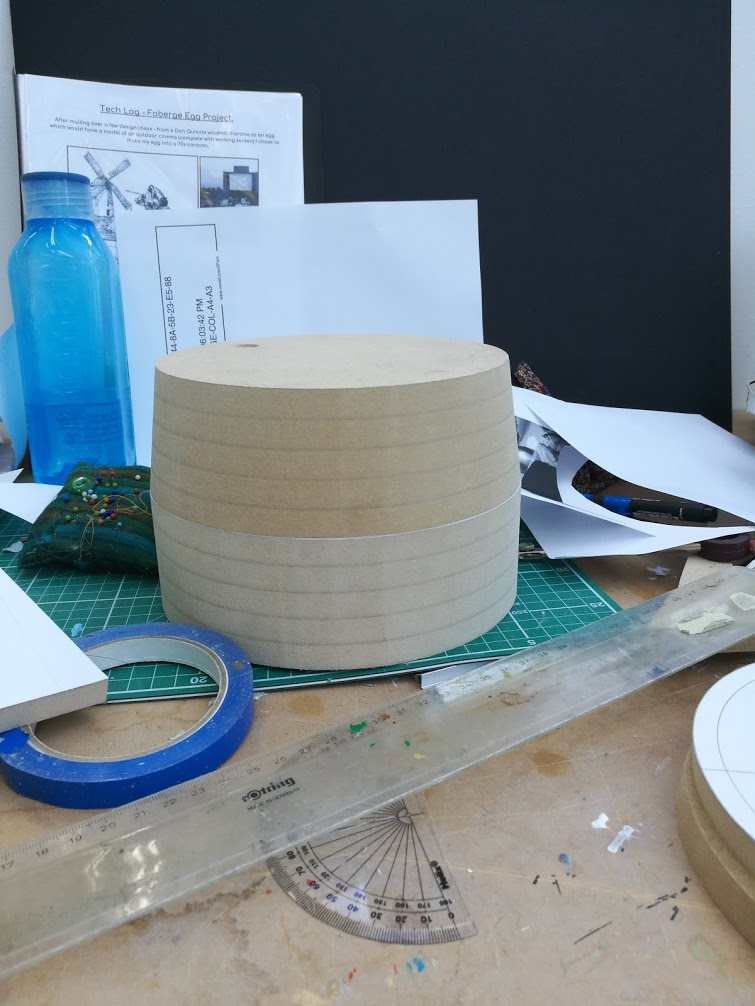
I then cut out all the disks out with a jigsaw - a lot of disks went into the making of this
mill! After cutting all these out I realized that the mill was going to be far to big so I had
to cut out all the disks out again. After doing this I glued the disks together in sections of 4 or 5.
mill! After cutting all these out I realized that the mill was going to be far to big so I had
to cut out all the disks out again. After doing this I glued the disks together in sections of 4 or 5.

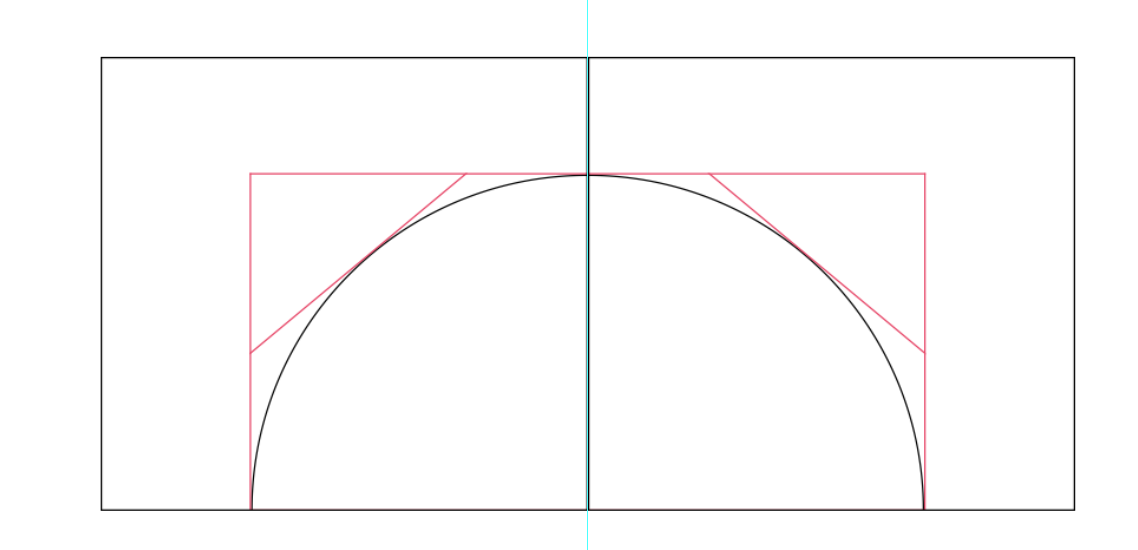
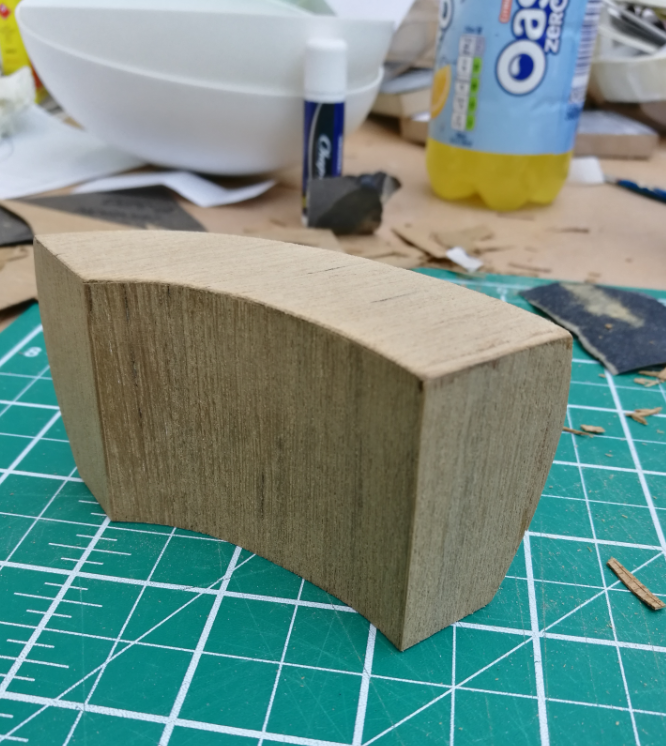
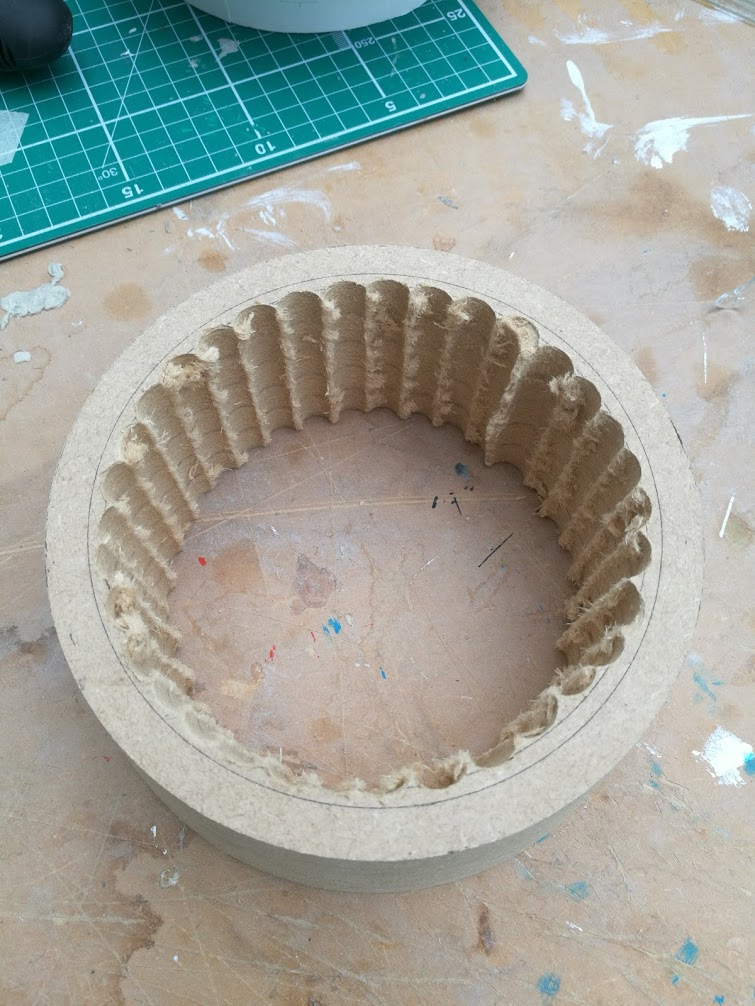
Now it was time to sand the angle on the disks to create the tapered body of the mill. I figured
out what angle was needed using my scale drawing and a protractor. I then cut out a piece of mdf
with this angle and used it as a guide to set the disk sander.
out what angle was needed using my scale drawing and a protractor. I then cut out a piece of mdf
with this angle and used it as a guide to set the disk sander.

I then hollowed out the sections using a pillar drill. I could have done this using the bandsaw however
I would have had to cut into the disks to get the blade inside which I did not want to do.
I would have had to cut into the disks to get the blade inside which I did not want to do.
I then sanded the inside of the sections, I needed the angle on the inside to match the one on the
outside so I made a jig which would allow me to sand this angle using the bobbin sander.
outside so I made a jig which would allow me to sand this angle using the bobbin sander.


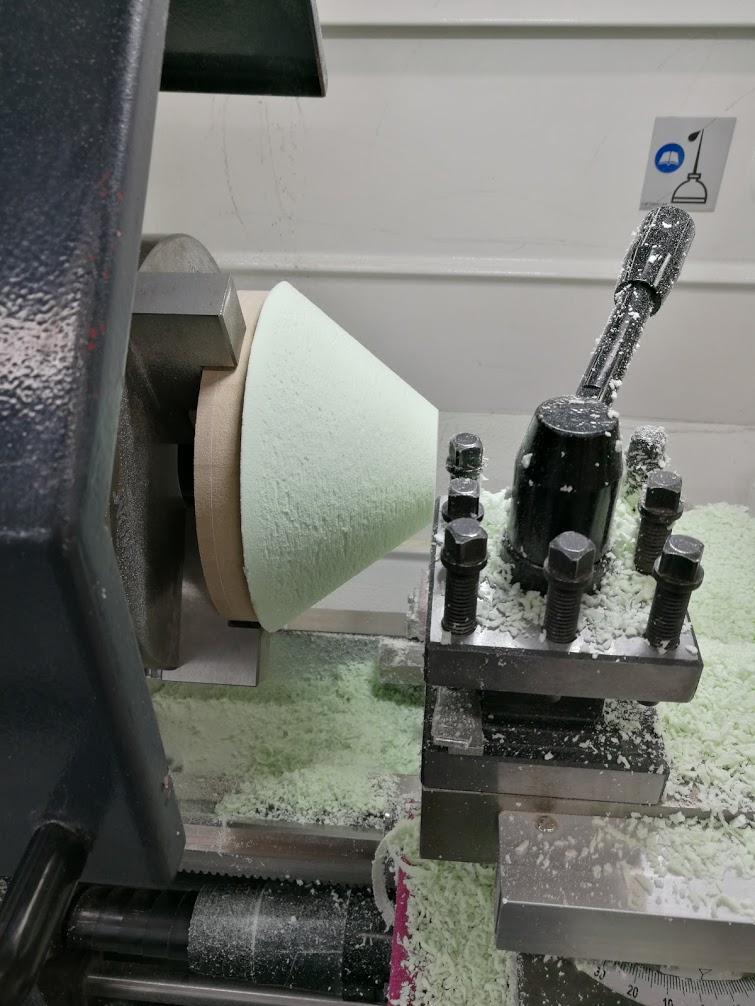
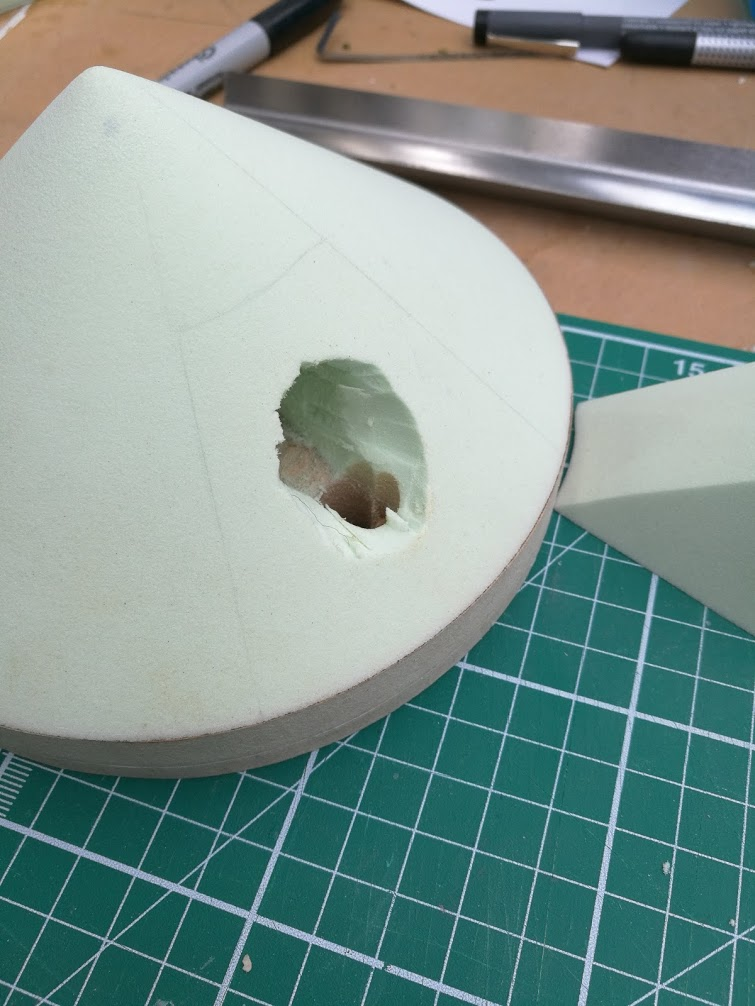
After the sections were hollowed out I began the construction of the head of the mill. I first cut
out another mdf disk which would be the base of the head. I then stuck a block of chemiwood to this
which I would put on the lathe and turn into a cone shape. After this I hollowed out a space in the roof
for the motor to sit in and I also cut a hole in the mdf base for the wires to go through.
out another mdf disk which would be the base of the head. I then stuck a block of chemiwood to this
which I would put on the lathe and turn into a cone shape. After this I hollowed out a space in the roof
for the motor to sit in and I also cut a hole in the mdf base for the wires to go through.
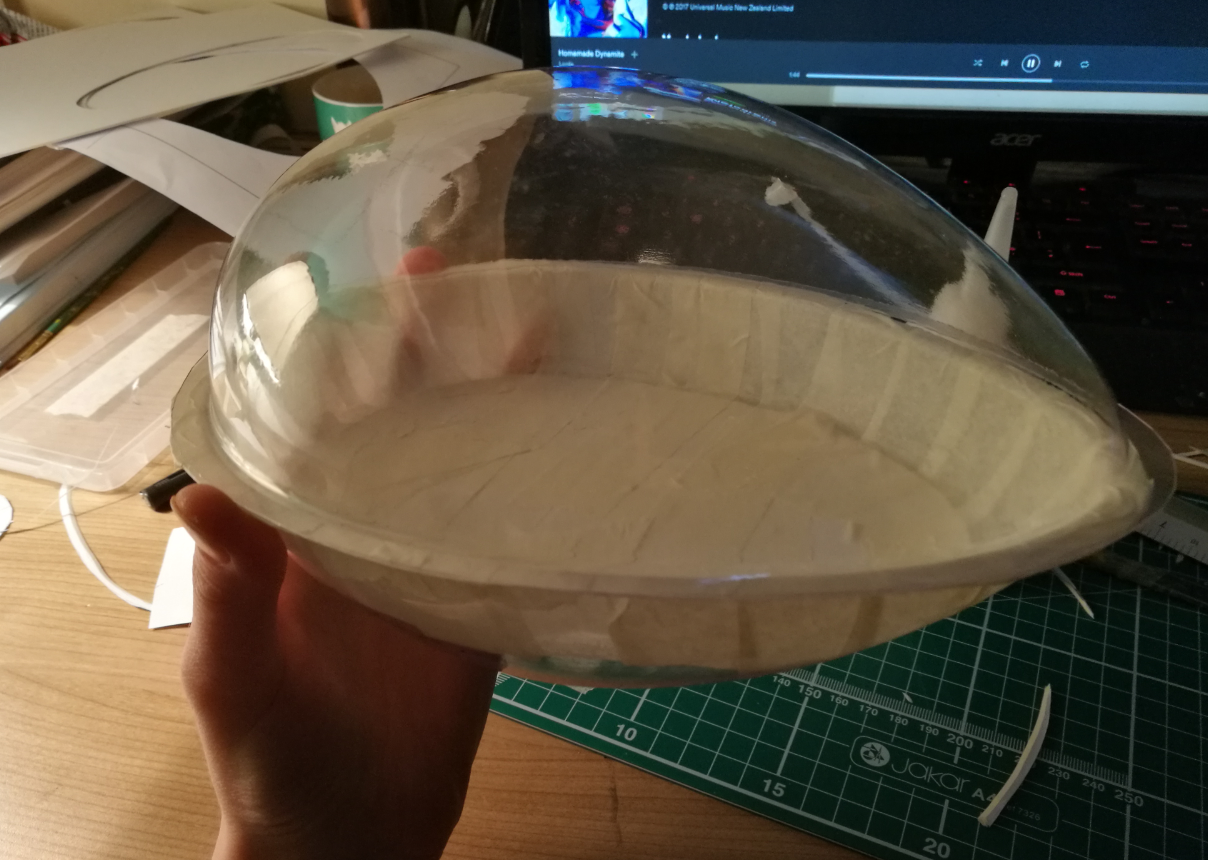
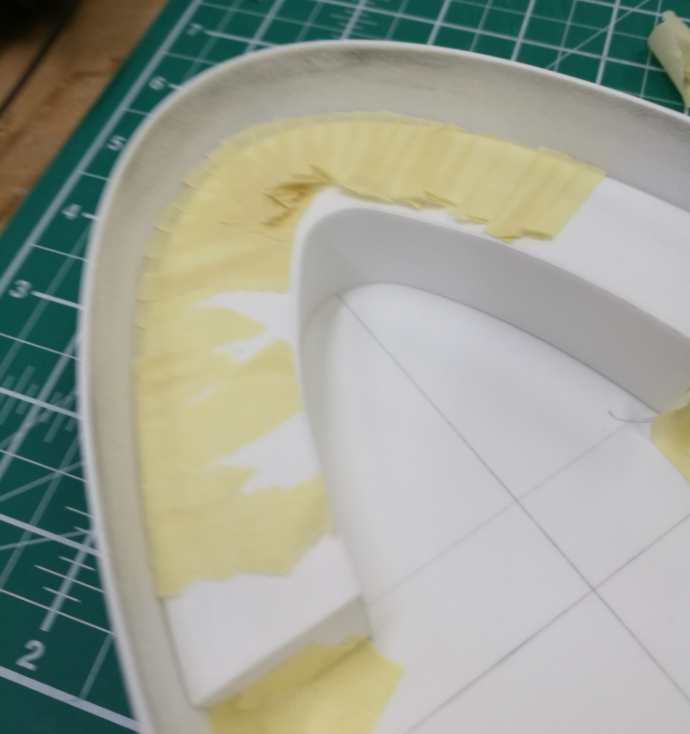
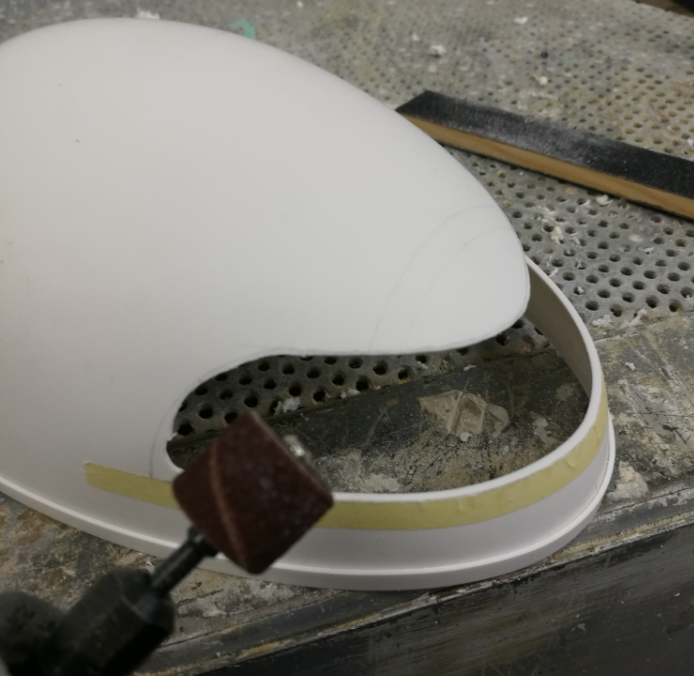
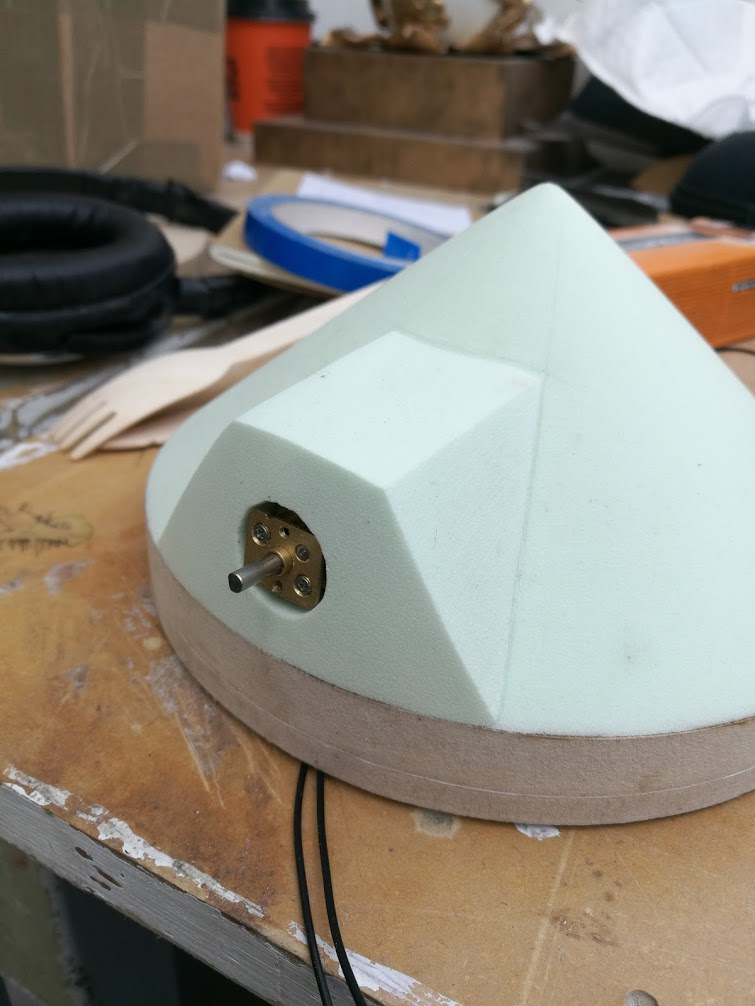
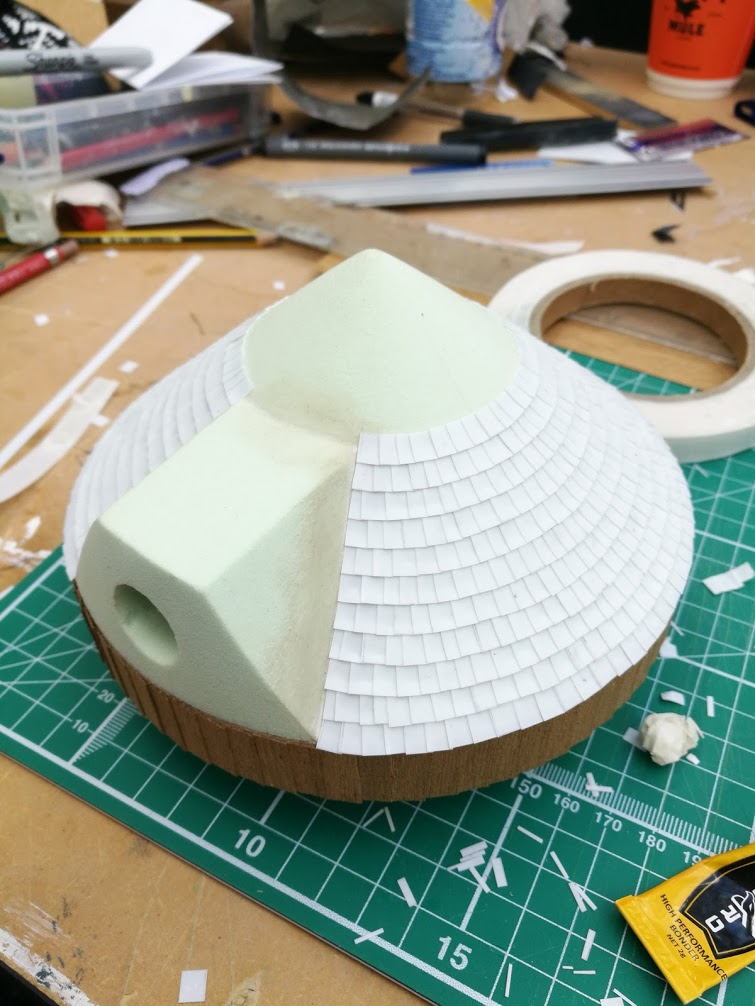
I then needed to make the housing for the sails. I cut out another smaller piece of chemiwood
and used the disk sander to sand it into the desired tapered shape. I stuck this onto the roof
and then made a hole for the motor to slide into.
and used the disk sander to sand it into the desired tapered shape. I stuck this onto the roof
and then made a hole for the motor to slide into.
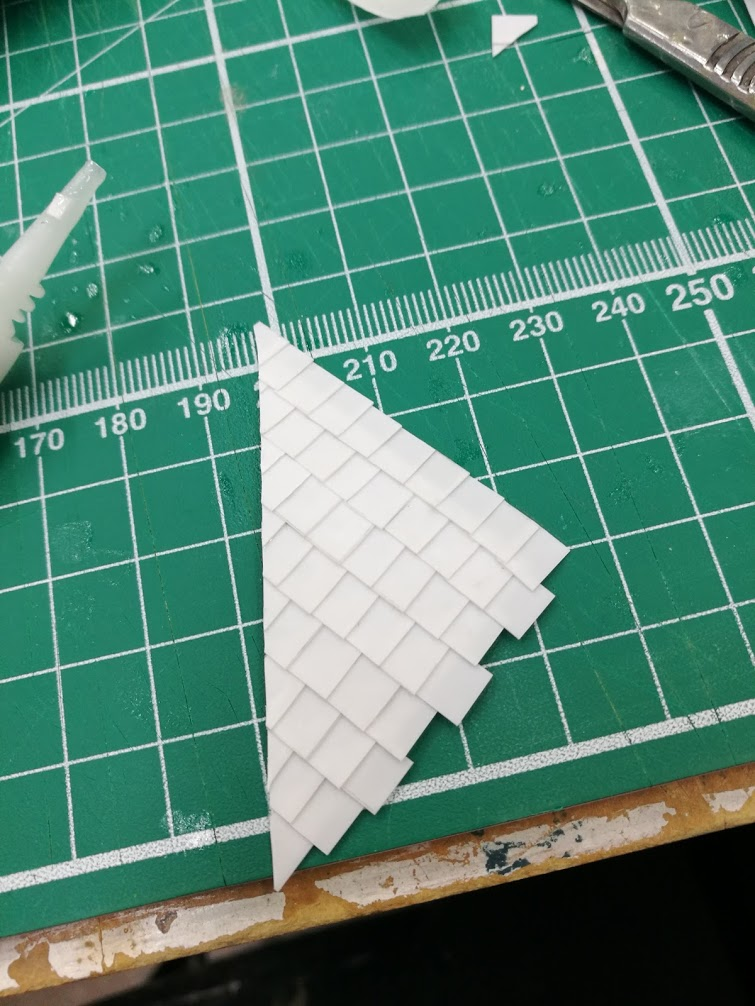
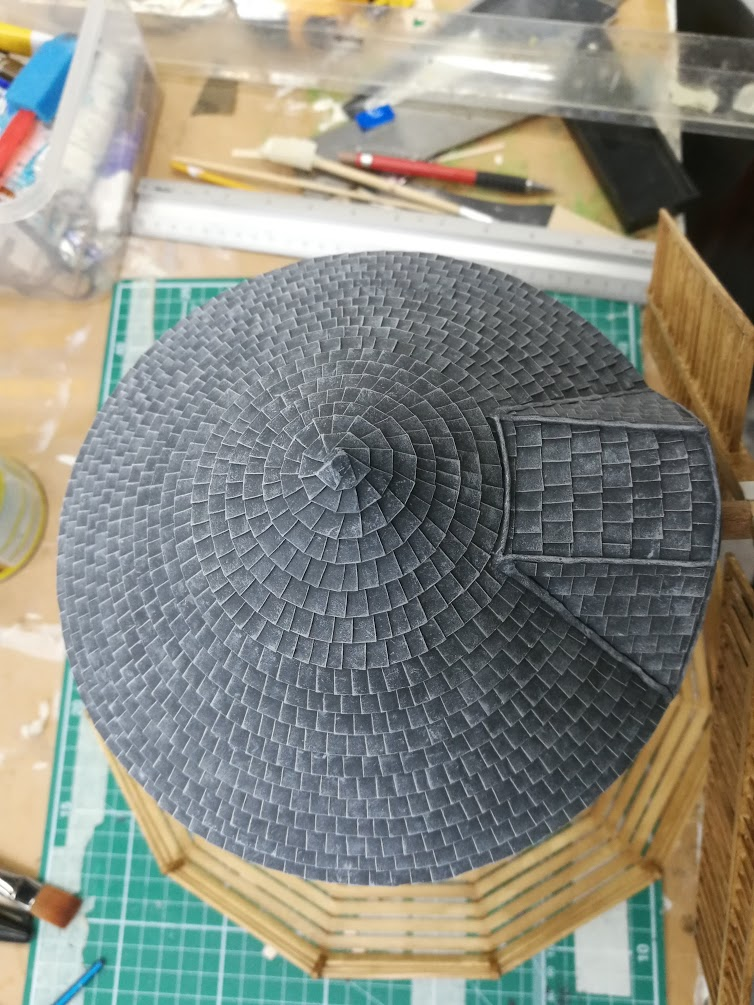
I needed to create the tiles for the roof. I used 0.03mm styrene and cut out loads of tiny
(0.4x0.5) tiles using my scalpel. I considered many different methods, but decided that this would
achieve the most realistic effect.
(0.4x0.5) tiles using my scalpel. I considered many different methods, but decided that this would
achieve the most realistic effect.

The sail housing was quite an awkward shape so I first stuck the tiles on a piece of styrene that was
the same shape as one of the sides. I then trimmed off the excess tiles using the styrene underneath as a guide.
the same shape as one of the sides. I then trimmed off the excess tiles using the styrene underneath as a guide.
Two days later.. more tiles stuck on.. and a bit of my sanity lost along the way..
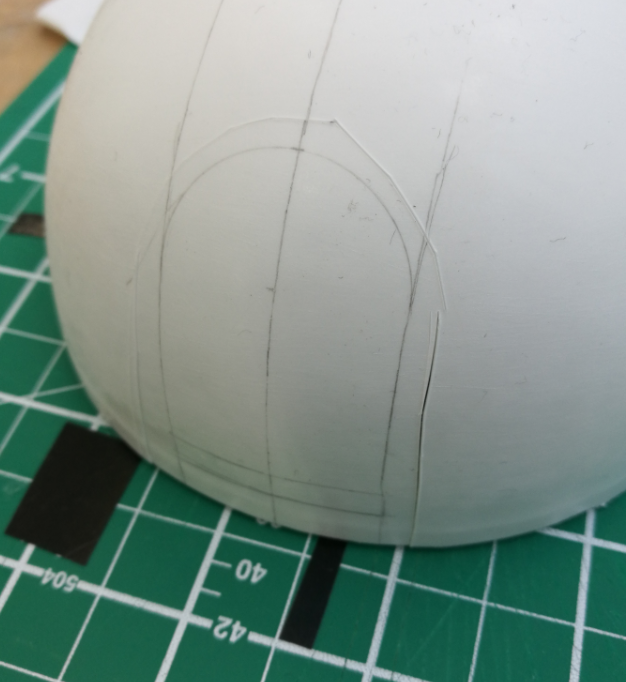
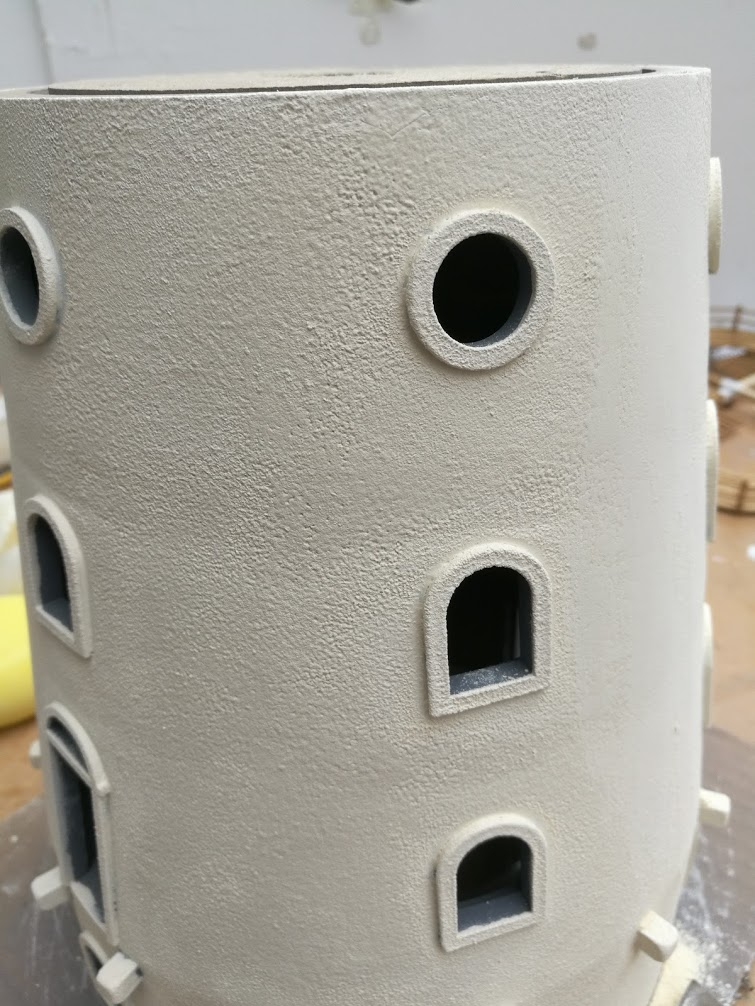
I then went back to working on the body of the mill. I marked out the placement of the windows
then used the pillar drill to cut out the holes for the windows. I then used a selection of sanding
sticks and files to make the holes the correct shape.
then used the pillar drill to cut out the holes for the windows. I then used a selection of sanding
sticks and files to make the holes the correct shape.

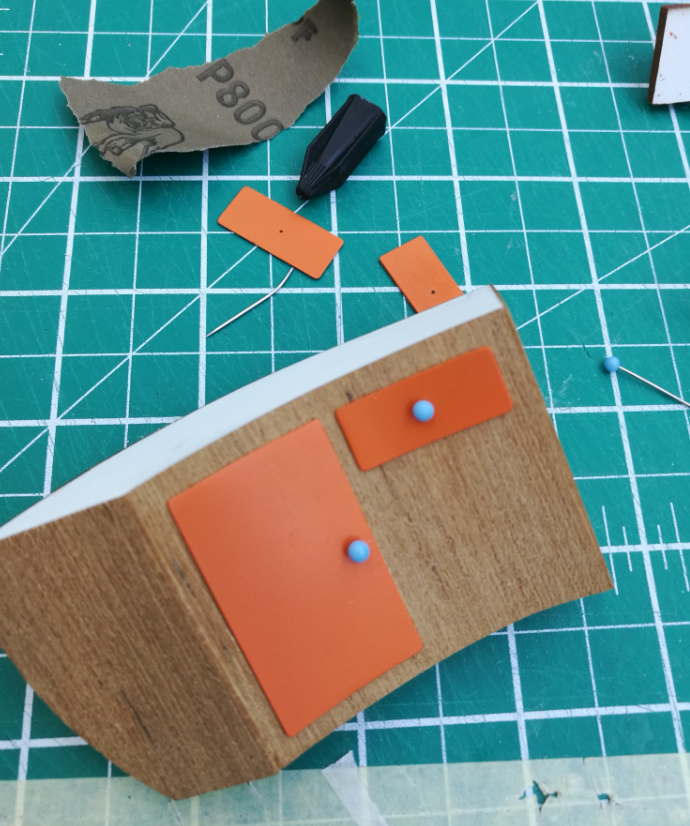
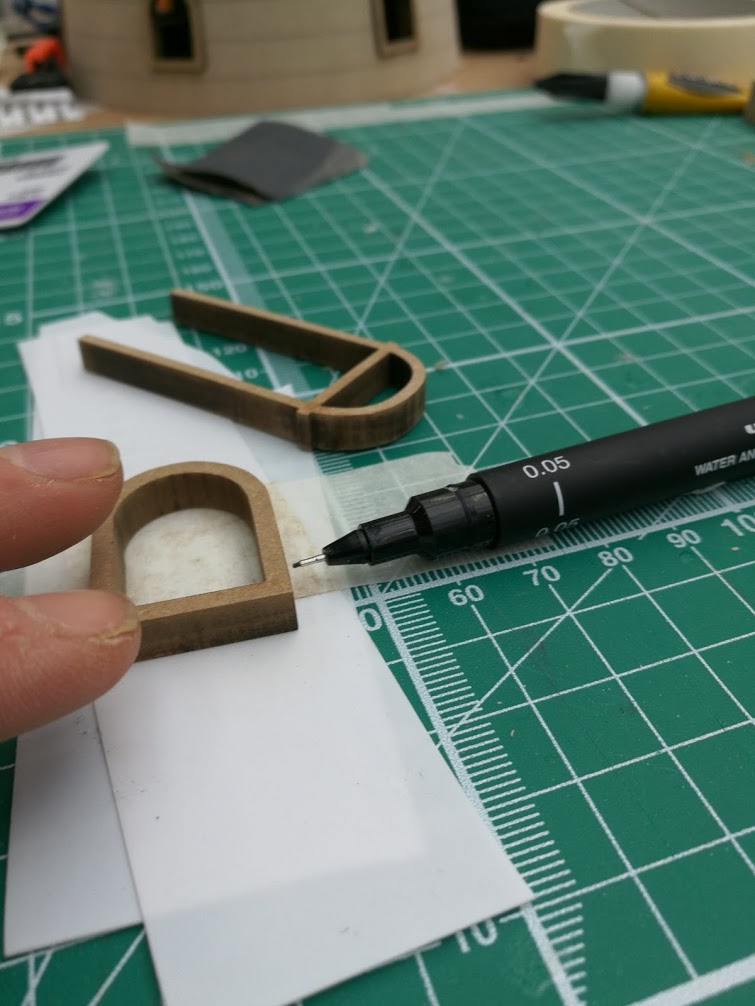
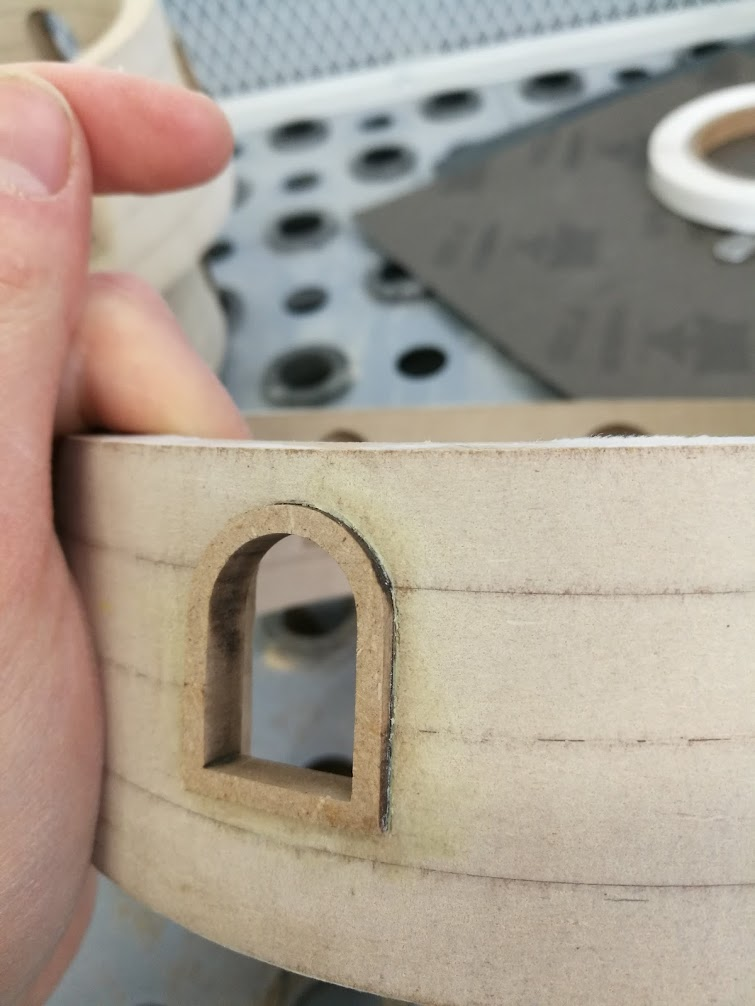
I used the laser cutter to make the window frames and then used a pen to mark how far the windows
needed to go in. I used PVA to glue the windows in and then filled any gaps with filler. Once dried
I sanded the filler and any remaining imperfections on the windows and mdf.
needed to go in. I used PVA to glue the windows in and then filled any gaps with filler. Once dried
I sanded the filler and any remaining imperfections on the windows and mdf.
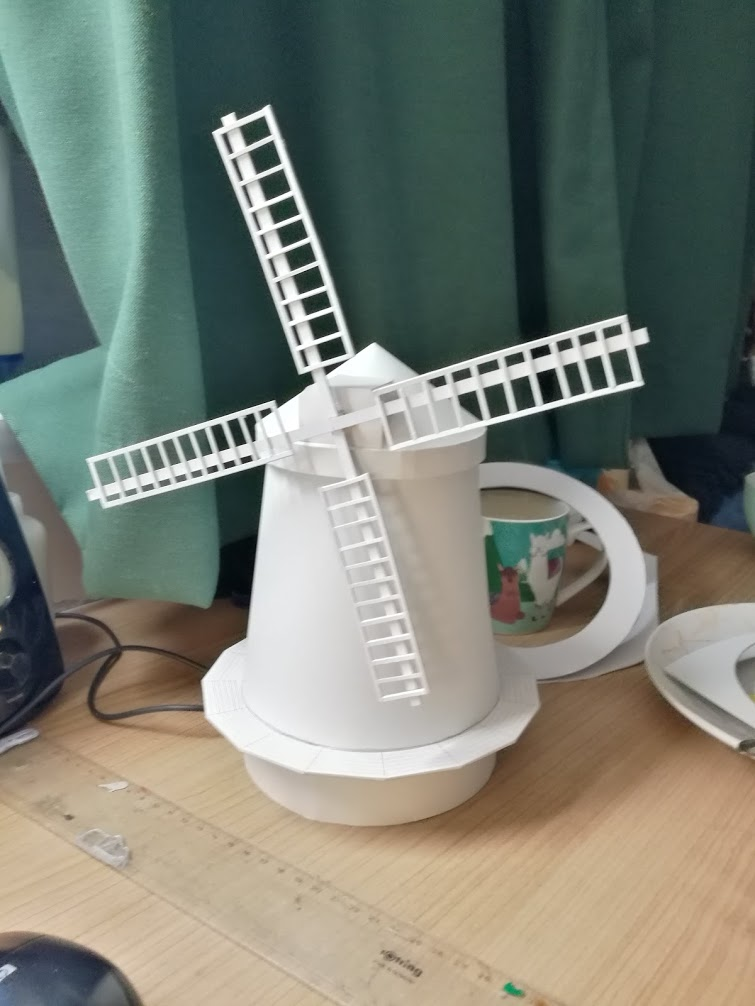
Once the windows were in, I stuck all the sections together and began to paint the body of the mill.
I primed the whole thing with around 8 coats of grey filler primer (It took so many coats as I was covering
the edges of the mdf rather than the sealed surface). The actual mill is covered in plaster so I decided to
apply my paint with sponges to achieve a slight bumpy texture. The first time I did this the surface was way
too textured so I had to sand it all off and start again. On the second try I pressed the sponge a lot
less firmly onto the surface and did around 4 light coats. Once this was dry I very lightly sponged
some browns and greys over the surface to add some color variation. I also masked off the windows and
sponged on a base coat of grey and then a few darker/lighter tones to bring out the texture.
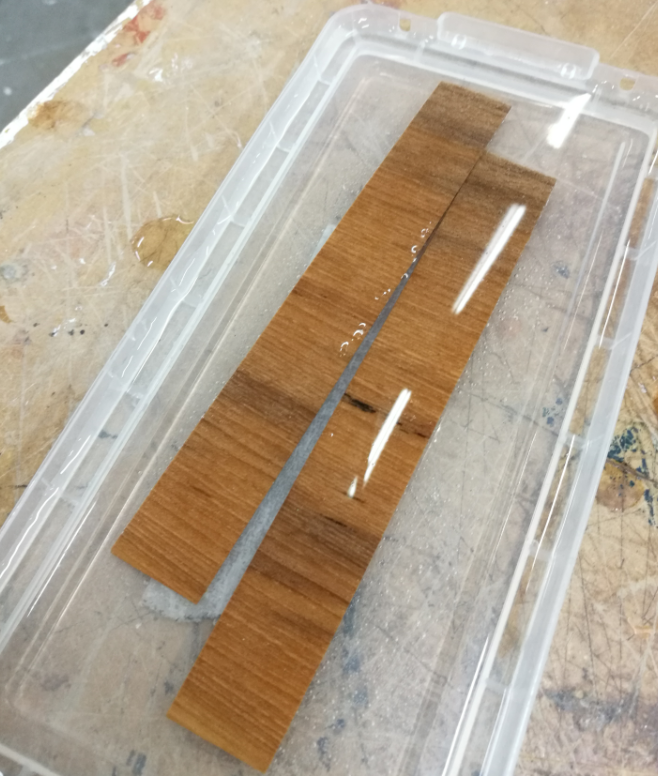
The base of the roof is covered in cladding so I used some teak veneer I had left over from a previous
project to make this. I painted the tiles with a base coat of matt grey then dry brushed dark greys and
white on top.
project to make this. I painted the tiles with a base coat of matt grey then dry brushed dark greys and
white on top.
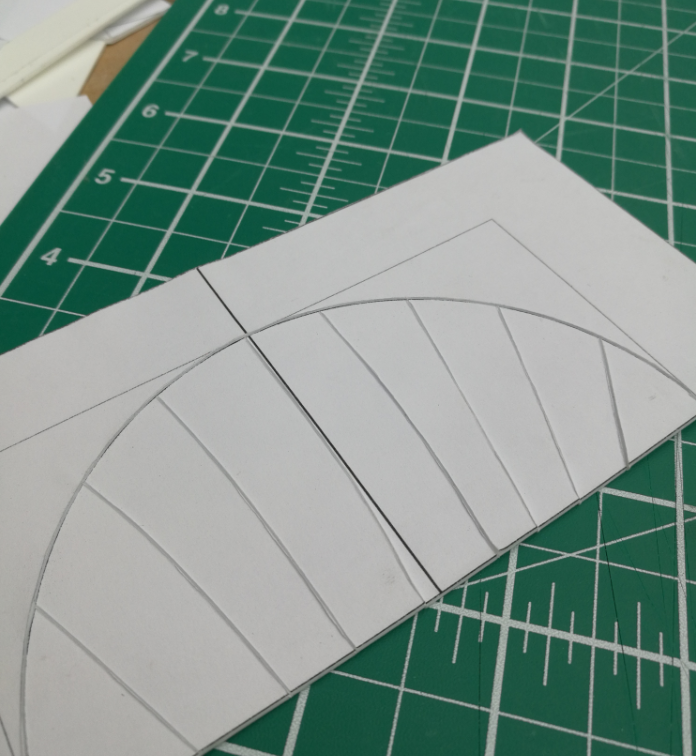
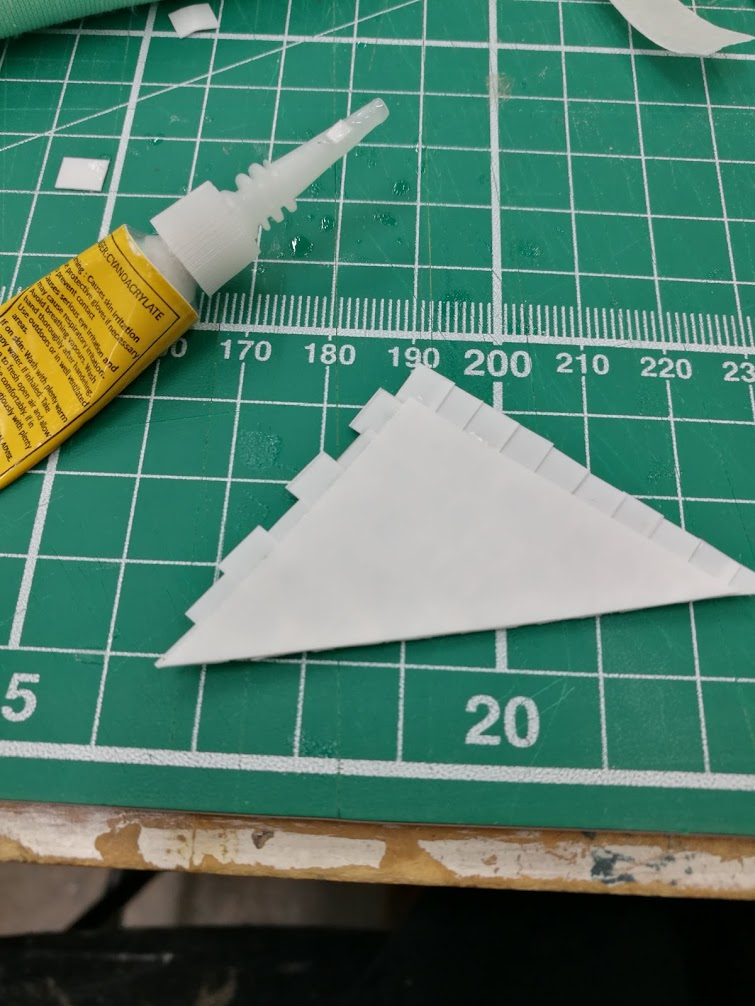
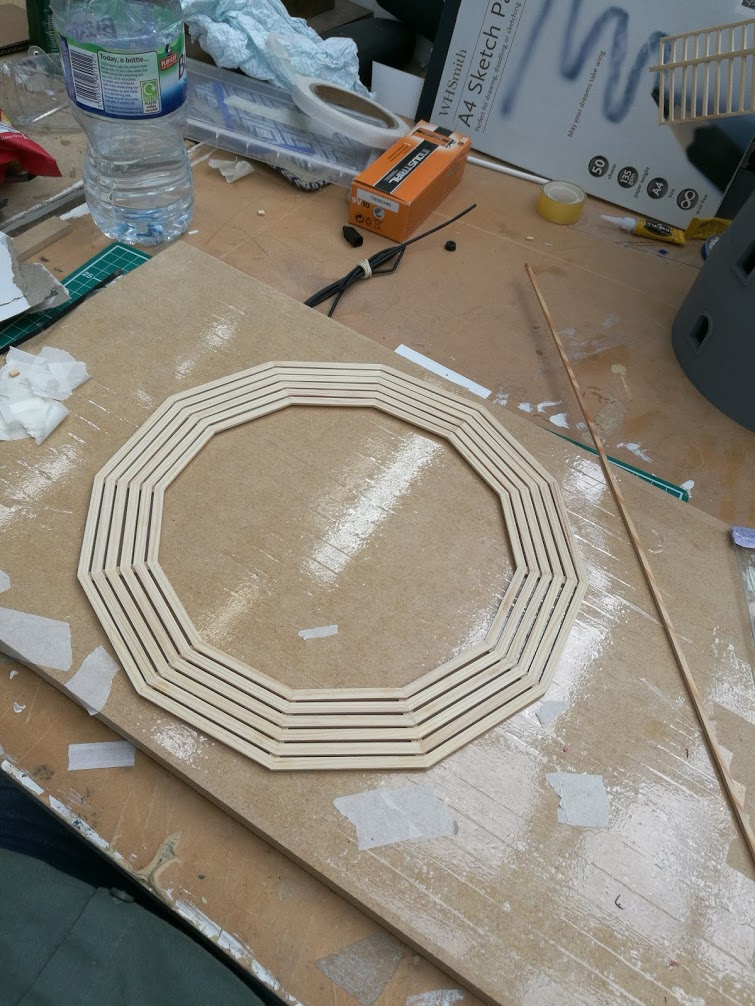
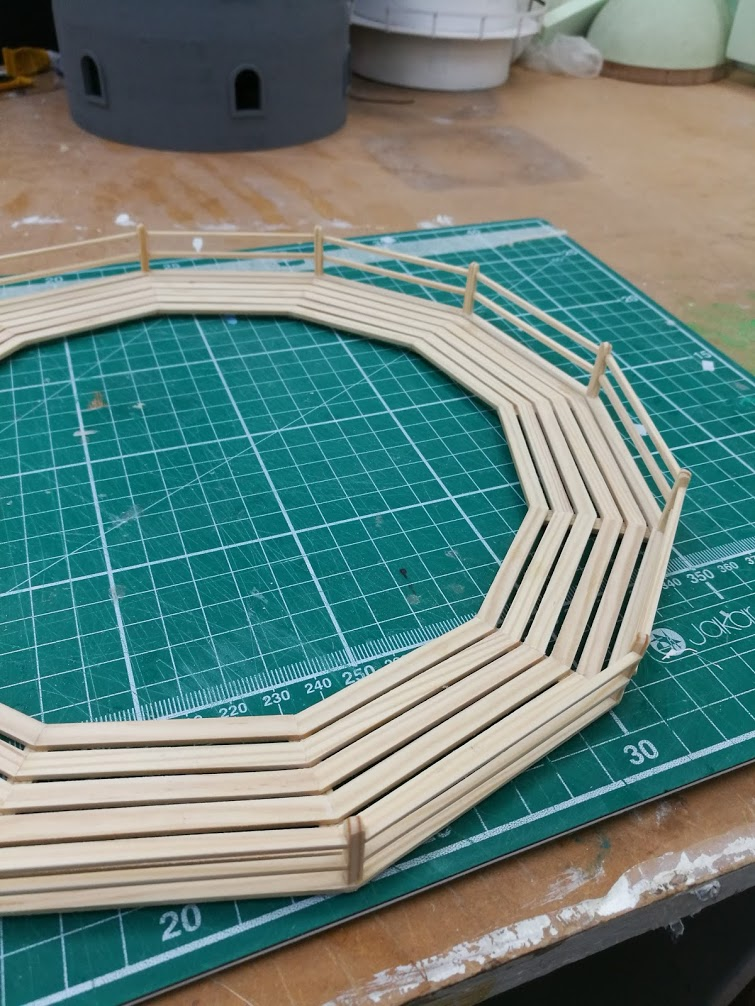
I then began to make the reefing deck. I could have used the laser cutter to make this however I wanted to
use traditional construction techniques as I thought this would match the style of the model better. I
drew out a scale drawing of the deck and used this as a guide for cutting and gluing all the pieces together.
I used a hacksaw to cut out all the pieces then sanded the angle on the bandsaw (I made a jig for this).
I also made the sails in a similar fashion.
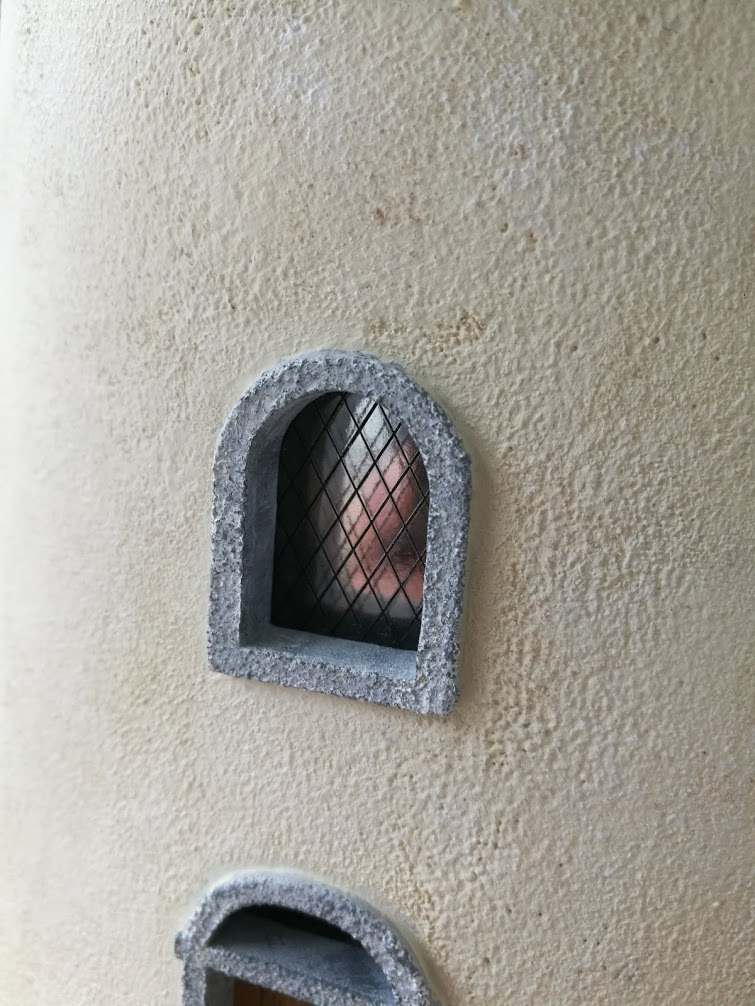
I then cut out the windows on the laser cutter in 2mm styrene and engraved a diamond pattern onto
the surface. Once these had been cut out I covered the windows in black paint, making sure it went into
the engraved lines, I then wiped the surface leaving the paint in the cracks. This gave me the effect of a
leaded window. I installed the windows and backed them with reflective card to prevent viewers from
seeing though the mill.
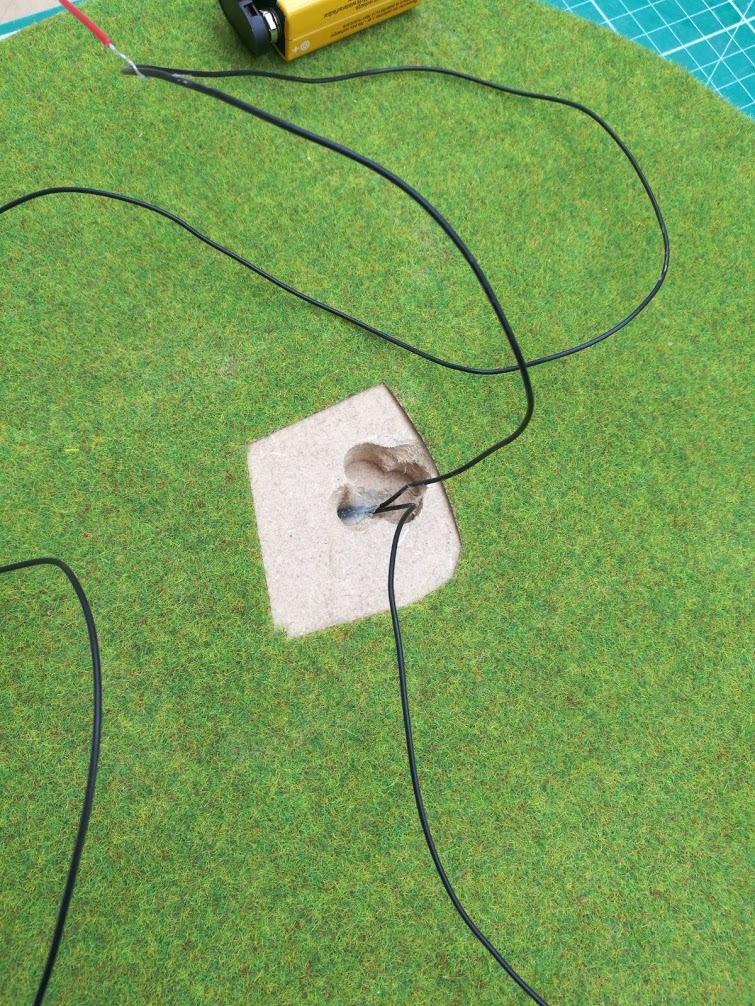
Once this was done I constructed the base which was made from two mdf disks with the top covered
in miniature grass. I covered the edge of this with pine veneer and then added a switch to the base
and connected this to the motor via a battery.
in miniature grass. I covered the edge of this with pine veneer and then added a switch to the base
and connected this to the motor via a battery.
I then placed the mill on top and.... voila! We have a working model of a windmill
Thanks for reading guys😁