Tree Climbing in Auroville

Tree climbing is a subject which brings together people from many different professions - from arborists to tree house builders to causal climbers. After the workshop in Auroville which gave me a great introduction to the techniques, tools and equipment of the trade I was inspired to continue exploring this area further. I found it to be an expansive field as well as a rather contested one, with differing ideas about the best methods for ascending/descending z tree. Philosophies abound, but first I want to discuss what I learnt during the workshop:
Throughout the week, we used what is called the SRS, which stands for the "Stationary Rope System". To begin, we selected a branch in the crown which we determined was suitably high and strong enough to hold our weight. We then used a throw line attached to a throw bag and flung this over the branch, then attached the climbing rope to the end of the throw line using a triple half hitch and hoisted it up over the branch and secured it in place. I attached a carabiner to my harness and then attached this to a GriGri which was then attached to the rope. A GriGri allows the climber to climb up, but clamps on the rope if the climber was to fall. I then attached a hand jammer to the rope with a foot loop attached to this. Like the GriGri, the hand jammer locks in place if there is any downward pressure, but is free to move when pressure is absent. To start climbing, you place your foot in the foot loop, and step upwards, while stepping up, you pull the slack rope through the GriGri. Once you have completed the step up and you are standing straight, there should be no slack left on the rope. You now sit back in your harness and move the hand jammer up the rope, then take another step up and repeat the process until you have ascended as far as you want to go. To come down you first have to remove the hand jammer as this will lock onto the rope and prevent your decent. You then sit back in your harness and gently pull the lever on the GriGri, this will allow the rope to flow through the device. Hold onto the standing end of the rope as it feeds through the GriGri, keeping you hand by your hips to make sure it does not get accidentally fed into the device. Keep letting the rope flow until your feet are back on the ground. I feel like this process is best described visually, rather than in words, but hopefully it's given you a general idea of how we did it!
Now I've covered how we climbed during the workshop, I want to go into more detail and explore the various methods I found arborists/tree house people use to ascend into the canopy.
- SRS (Stationary Rope System) formerly called SRT (Single Rope Technique)
- MRS (Moving Rope System) formerly called DbRT (Doubled-rope Technique)
Some info about each type:
SRS (Stationary Rope System): (The same one we used for the workshop). This method has seen a lot of technical development recently, with Kevin Bingham at the forefront. His Singing Tree Rope Wrench and Rope Runner inventions have made a big impact on the industry as well as encouraged some MRS traditionalists to consider new methods.
How does it work? One end of the rope is anchored to a branch or the base of a tree, and the climber ascends the other end of the rope by means of some type of mechanical device attached to it. The most common of these devices is an ascending-and-descending device attached to the rope by which the climber “walks” up the rope. This method of climbing makes better use of the climber’s stronger leg muscles. It can be more of an efficient method than MRS, but it also requires more equipment and is therefore more expensive.
MRS (Moving Rope System): This is the more traditional technique out of the two.
How does it work? A single line is used with the rope doubled back from the Tie-in Point (TIP) to the climber. The doubling of the rope gives the climber a theoretical mechanical advantage in ascent, though this is reduced by friction in practice. The climb line must move freely between the climber and the TIP to allow smooth movements of the climber. Ascent with MRS requires moving 2’ of rope for every 1’ of elevation. The muscles of the upper body do most of the work. Using a foot ascender on the running end of the climb line can be a big help in saving energy on the climb.
Further Info about SRS & MRS
This is a good video series about SRS. Click Here For Video
In the video they use different techniques and equipment to the ones we used in the workshop such as a hitch climber pulley and a rope wrench instead of a GriGri and a hand jammer. There are many different equipment alternatives and techniques to use with the SRS, but they more or less achieve the same thing, it just depends on what you prefer to use.
This is a short but informative video about MRS. He covers both systems, but starts with MRS. Click Here For Video
This is also a great intro vid: Click Here For Video
(Note it is titled with the outdated name of DRT rather than MRS)
SRT vs MRS - What are the pros and Cons?
This video covers both systems and is a good one to watch to get an idea of how the two differ from each other. Click Here For Video
Advantages of SRS
- No need to isolate the Tie In Point (TIP)(as there is only one one rope line)
- Much faster, more efficient ascent
- Legs are used more - less upper body strength used
- Basal anchor can be set up to allow lowering / rescue of climber
- No increased friction on system from line contact with tree
- Many re-directs are easily possible
- Natural redirects can be removed after climber exits tree
- Less line needed to reach the ground on a spar pole
- Traversing and using multiple TIPs are ready options
Disadvantages of SRS
- TIP will be double-loaded if basal (tree base) anchor is used
- May require changing hardware to switch from ascent to descent
- More knowledge and gear is required
- Less familiar system for many
Advantages of MRS
- One system allows ascent, descent, and work-positioning
- Theoretical mechanical advantage
- Minimal gear required
- Single load on TIP
- No anchoring leg of line below to worry about
- More familiar systems for many
- TIP must be isolated (around only one branch)
- Less efficient ascent
- Requires more upper body muscles
- Doubled line has less energy absorption than single line
- Increased friction in system as line contacts the tree
Tips from around the net:
- Tie-in Point (TIP). Be very sure of your TIP! If you can’t see it - don’t use it. In SRS, the TIP can be called the Primary Suspension Point (PSP). Use binoculars to verify a high TIP. Your TIP must be strong enough to safely load in all the intended directions
- PSP Considerations: SRS climbing requires only a single leg of rope to be clear to climb. There is no need to isolate the Primary Suspension Point (PSP). If the line is secured below the PSP, the force on the PSP will be 2 times the weight of the climber. Force at PSP = 2 x Climber! The line can be locked off on a limb to return to a 1 x climber force.
- Rate of Progress In MRS systems: the climber must move 2’ of rope through the system to gain 1’ of elevation. Rate of progress = 1:2. Rate of Progress In SRS systems, the climber gains 1’ of elevation for every 1’ travelled on the rope. Rate of progress = 1:1
Now we've had a basic introduction to tree climbing, I think I'll leave it here and go on to explore both SRS and MRS separately in more detail in future articles. For now, I'll leave you with some info about some cool tree climbing knots:
General Knot & Rope Terms
- Standing End: The long end – the part not knotted. The standing part lies between the standing end and the knot.
- Tail: The short end – the part getting knotted.
- TDS: Tie, Dress (align the parts), Set (tighten the knot or make ready for use)
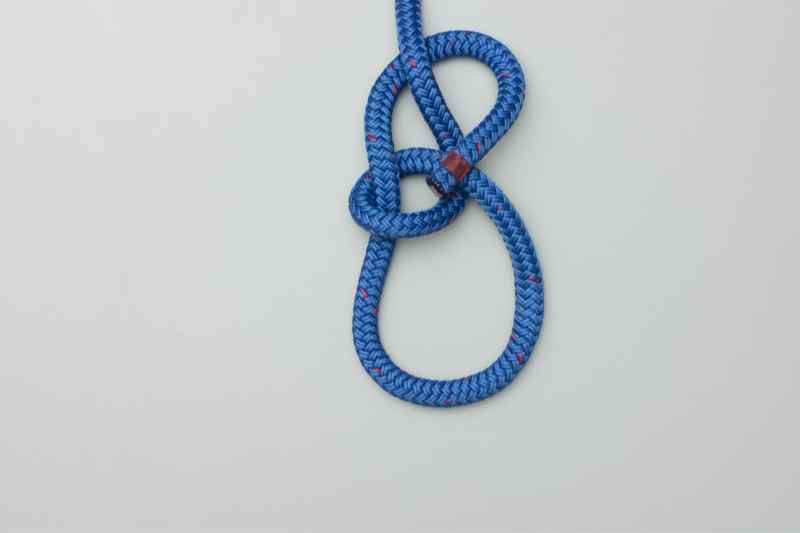
Bowline (pronounced bow-lin)
- The Bowline makes a reasonably secure loop in the end of a piece of rope.
- Under load, it does not slip or bind. With no load it can be untied easily.
- One of the most popular knots used by Arborists and tree climbers.
- Its principal shortcoming is that it cannot be tied, or untied, when there is a load on the standing end.
How to:
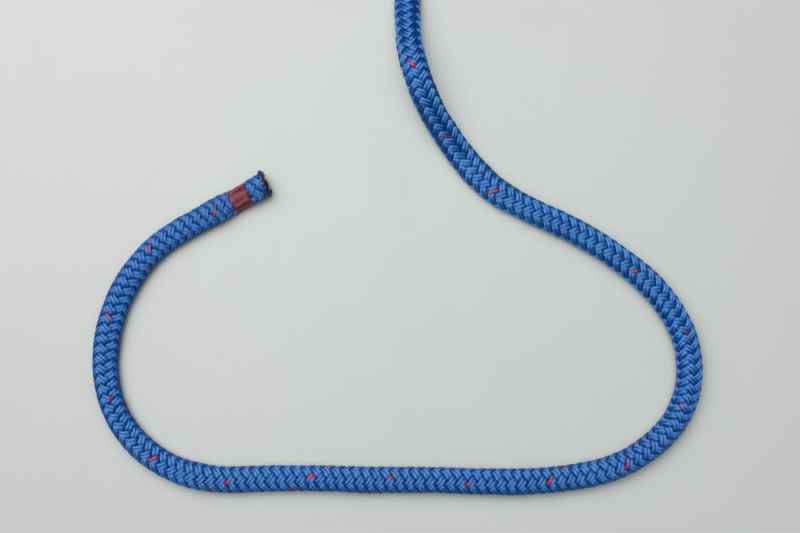
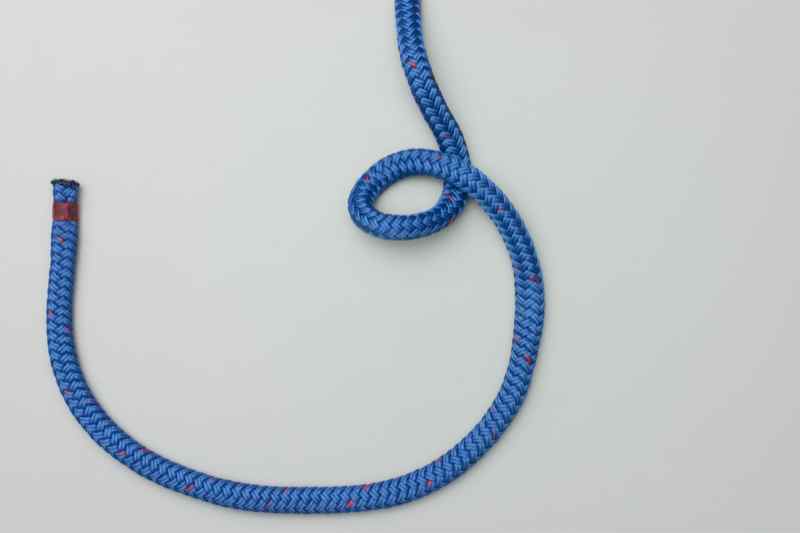
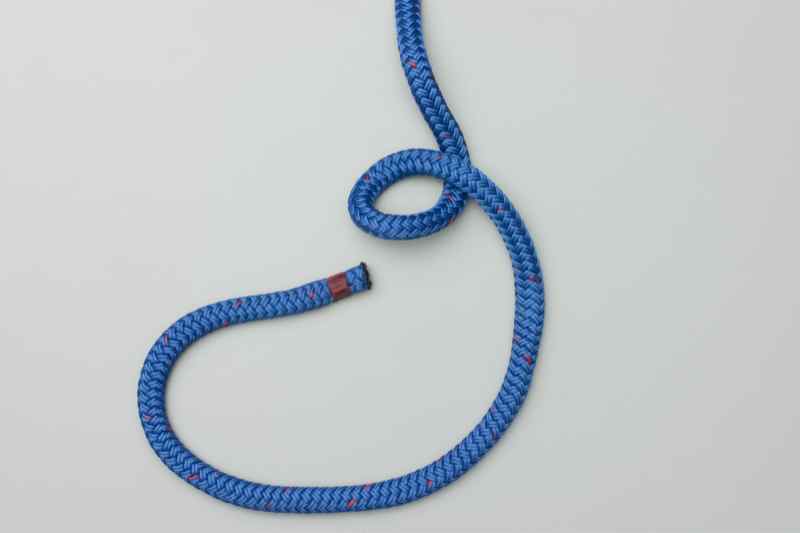
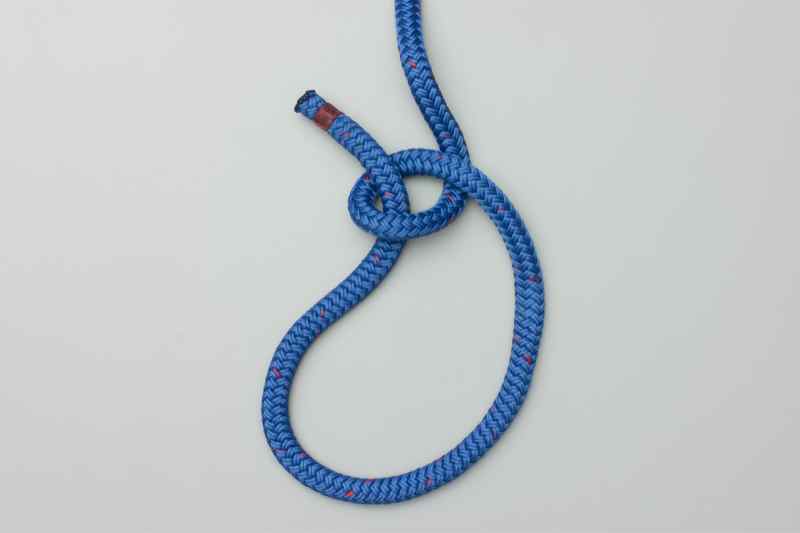

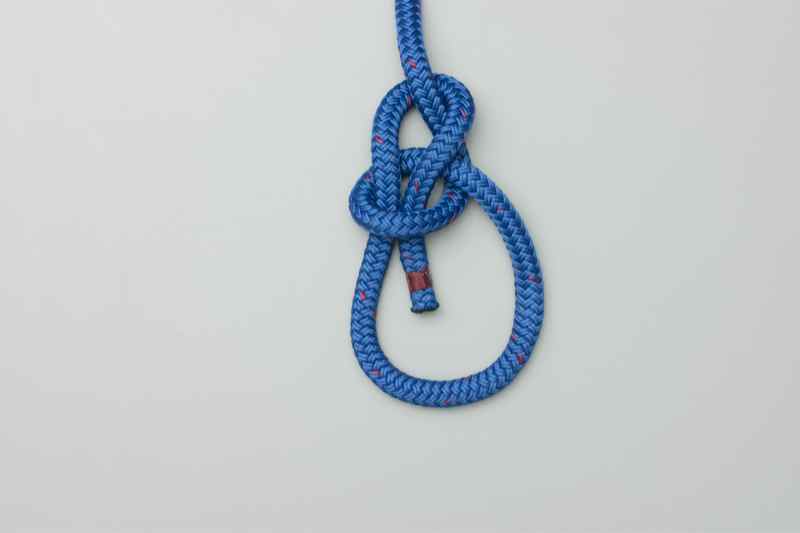
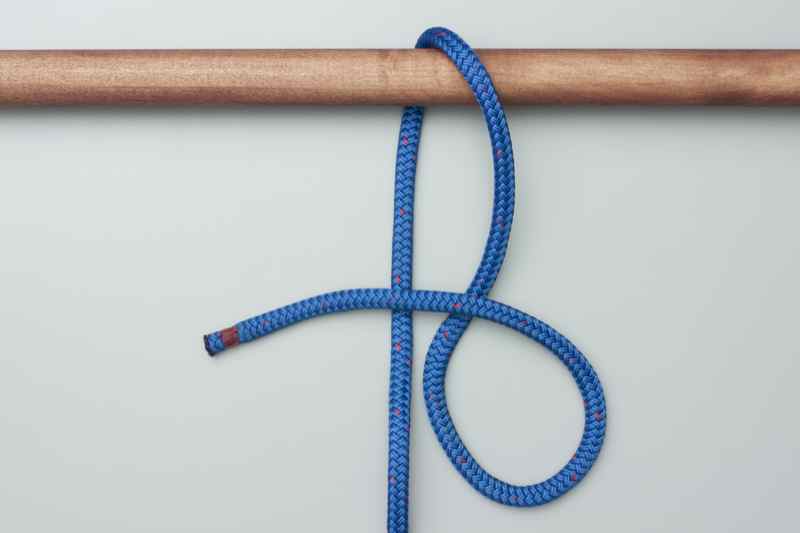
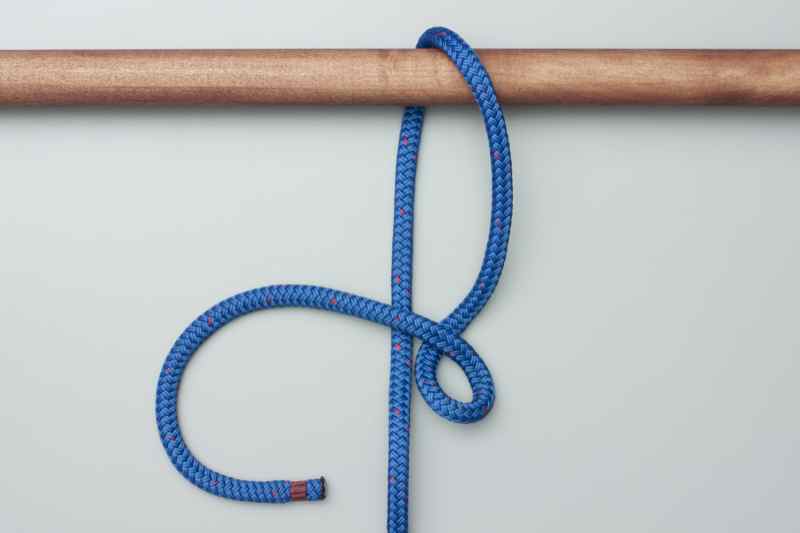
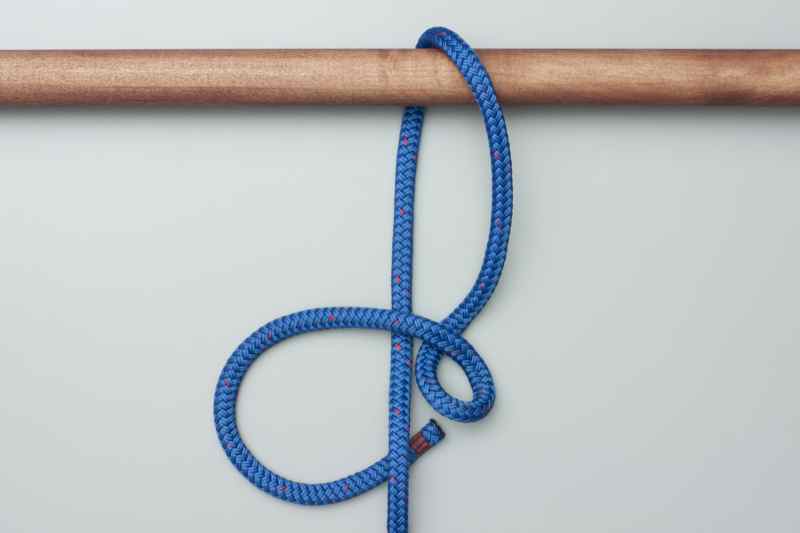
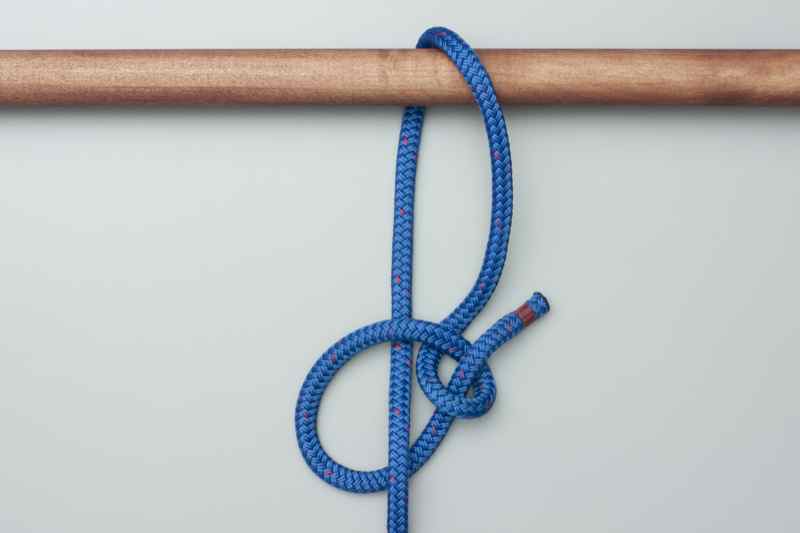
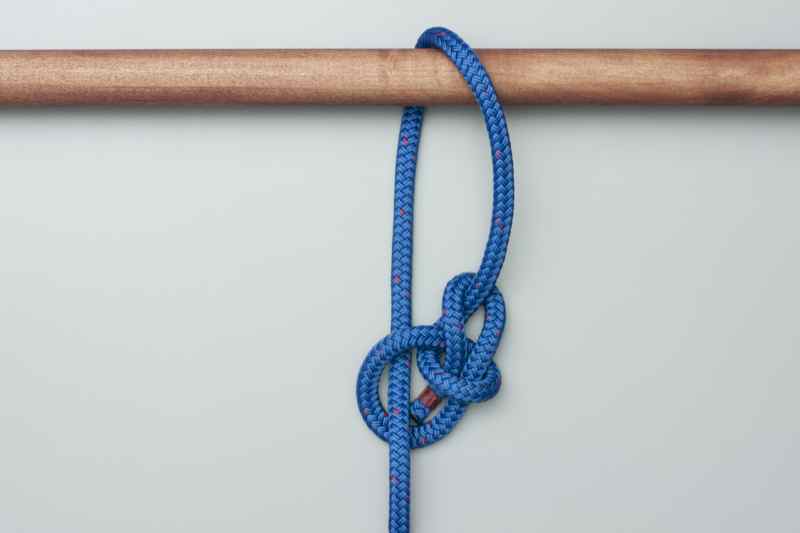
Running Bowline
- The running bowline is an extension of the standard bowlin knot. It is a valuable way of tying a type of noose which will not bind and can be slid undone easily.
- It can be useful for retrieving objects by throwing the open loop around them and the loop will tighten down on the object, as the standing line is pulled tight. The knot does not bind against the standing line and can be easily undone.
- In tree surgery it can be used for rigging (Tree rigging is the art of dismantling parts of or whole trees using ropes, blocks and pulleys. It can range from large pieces of timber to awkwardly shaped branches and tight drop zones where damage has to either be kept to a minimum or eliminated entirely.)
How to:
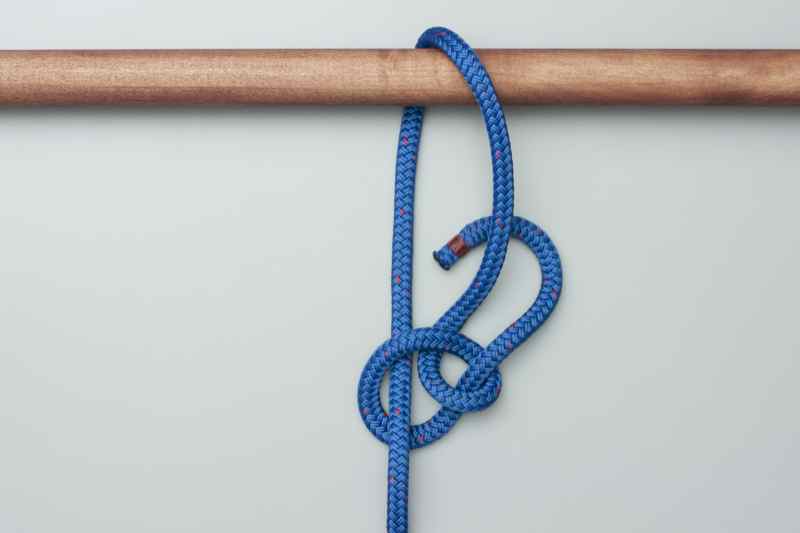
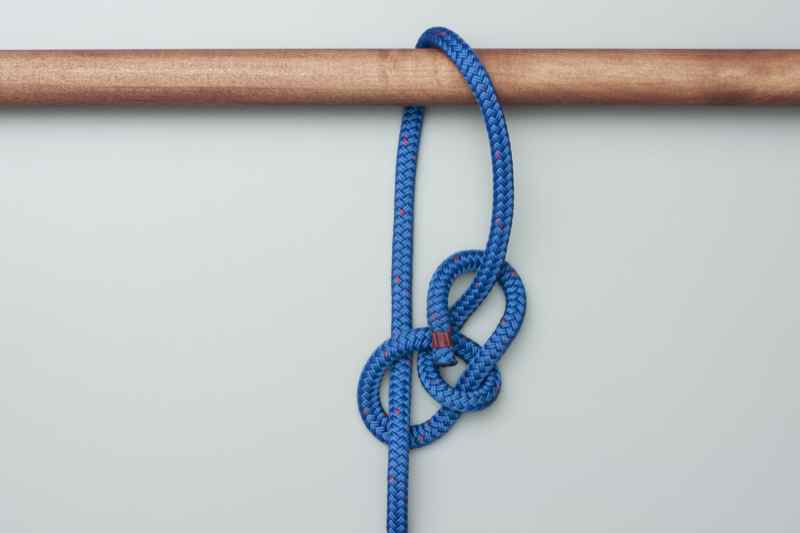

Alpine Butterfly:
- This creates a secure loop in the middle of a length of rope.
- This can be used for tying off your climb line in the canopy for SRS.
- The Alpine Butterfly Loop is useful anytime a secure loop is required in the middle of a rope.
Sites Referenced and Used:
Thanks for Reading!
P.S let me leave you with some funky pictures of some cool women chilling in trees:


No comments:
Post a Comment